Medición y navegación en diseños 2D y 3D
Resumen
Esta guía te muestra cómo agregar mediciones y anotaciones a tus estudios médicos, y cómo explorar datos usando diseños 3D y de paneles múltiples en 3DICOM.
Instrucciones paso a paso
Agrega mediciones a tu escaneo
Paso 1. Abrir el Medición menú.
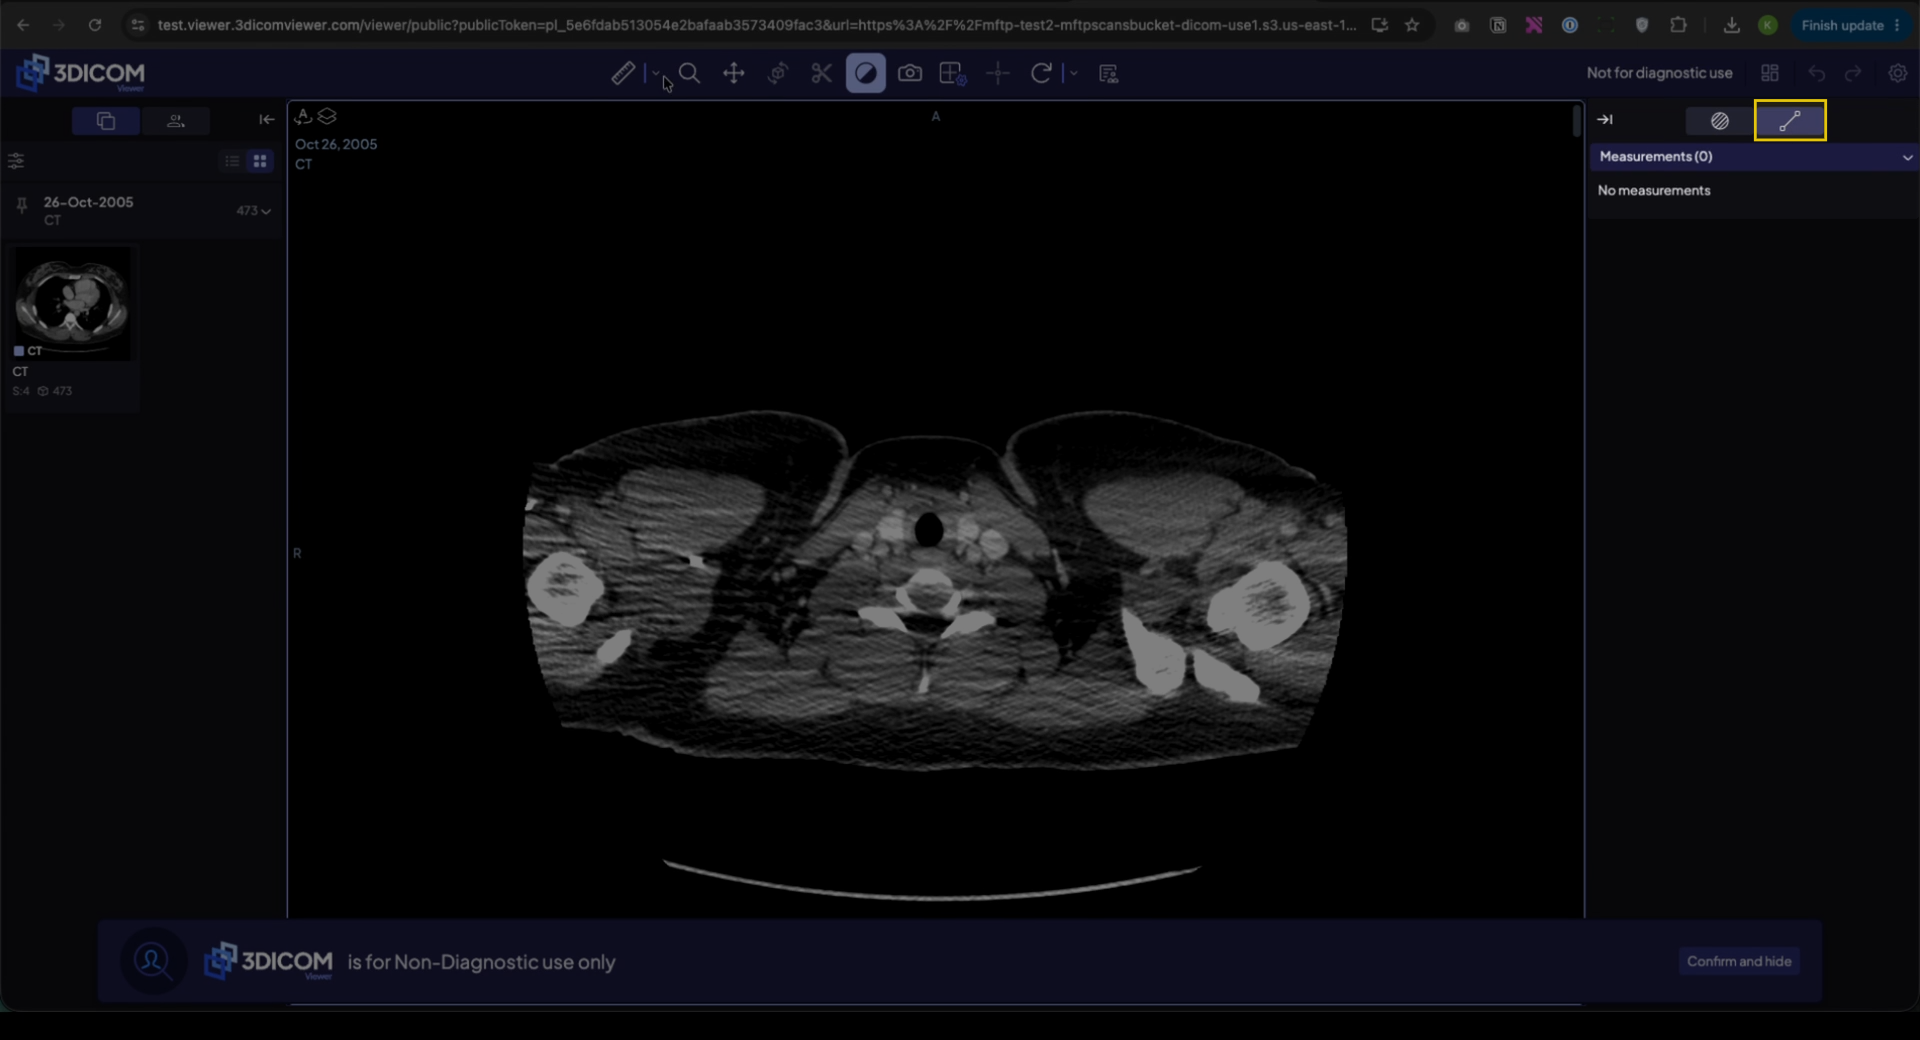
Paso 2. Selecciona una herramienta de medición, como Bidireccional.
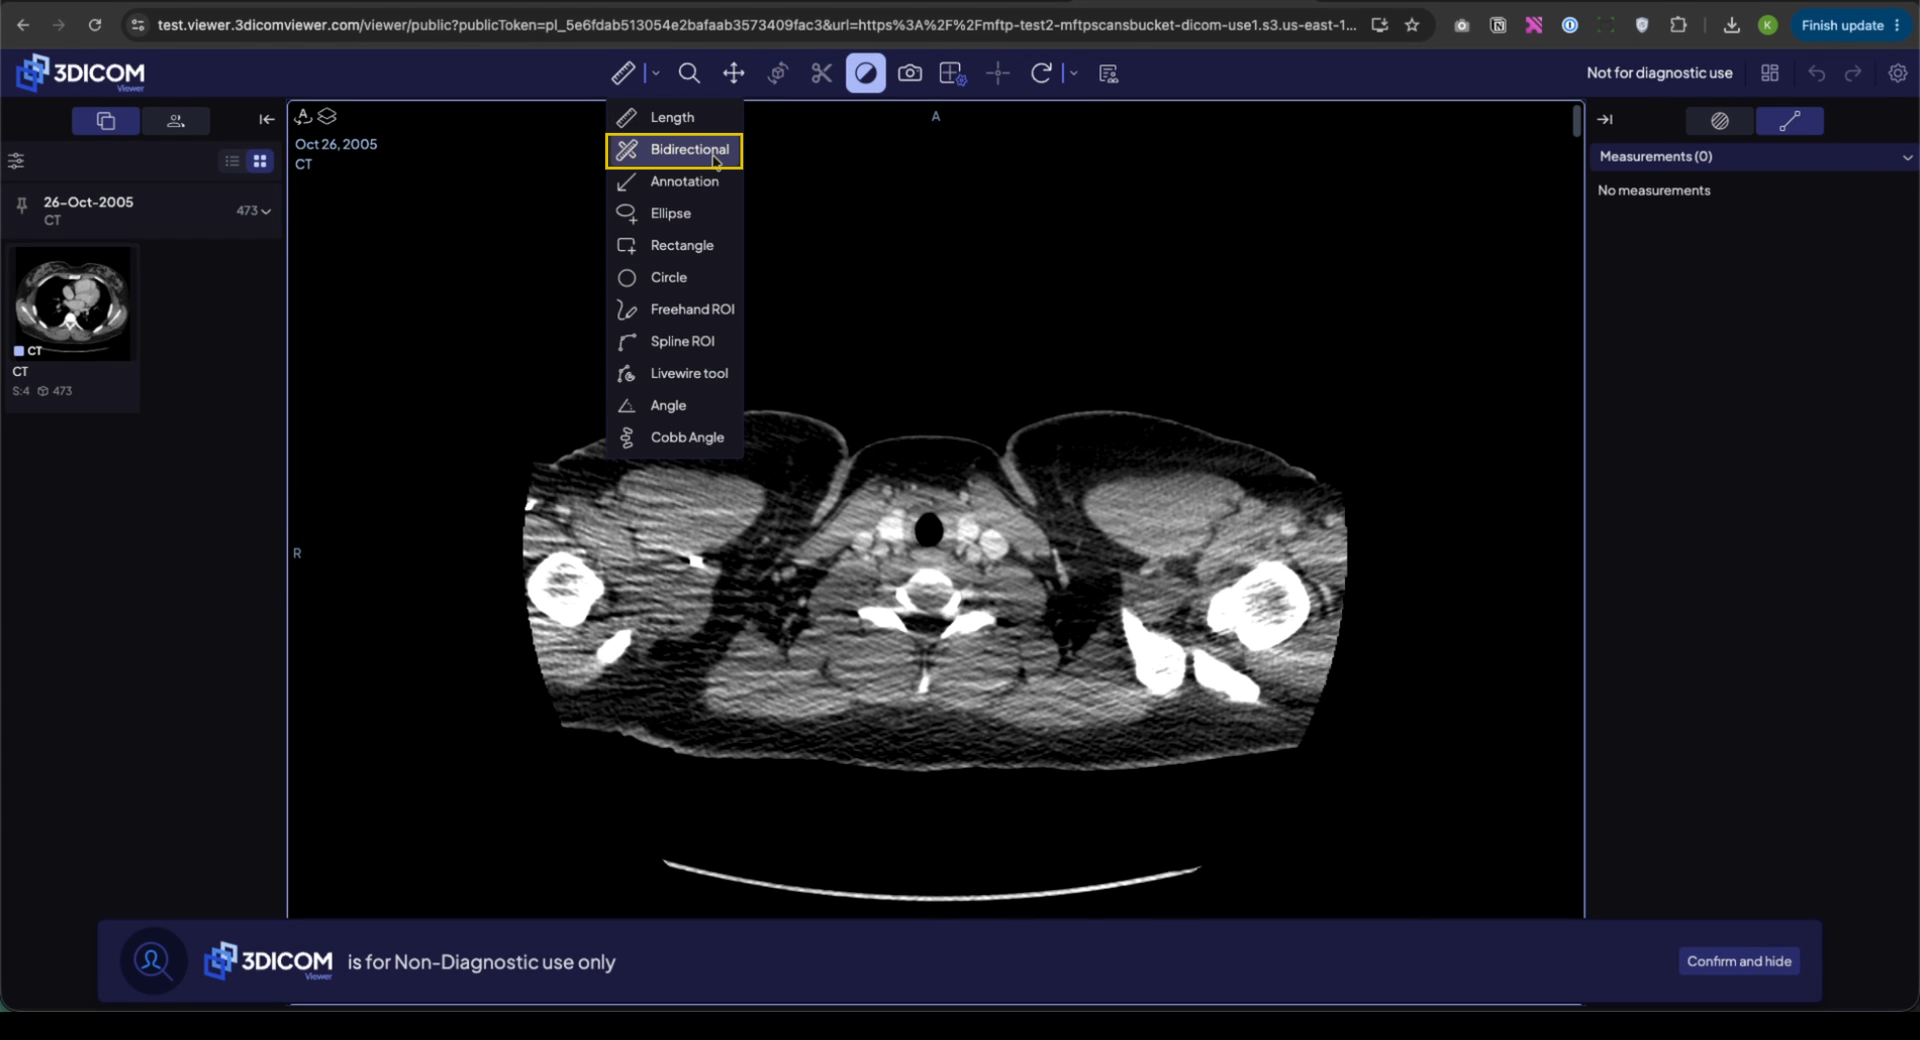
Paso 3. Haz clic y arrastra sobre el área que deseas medir y haz clic de nuevo para completar la medición.
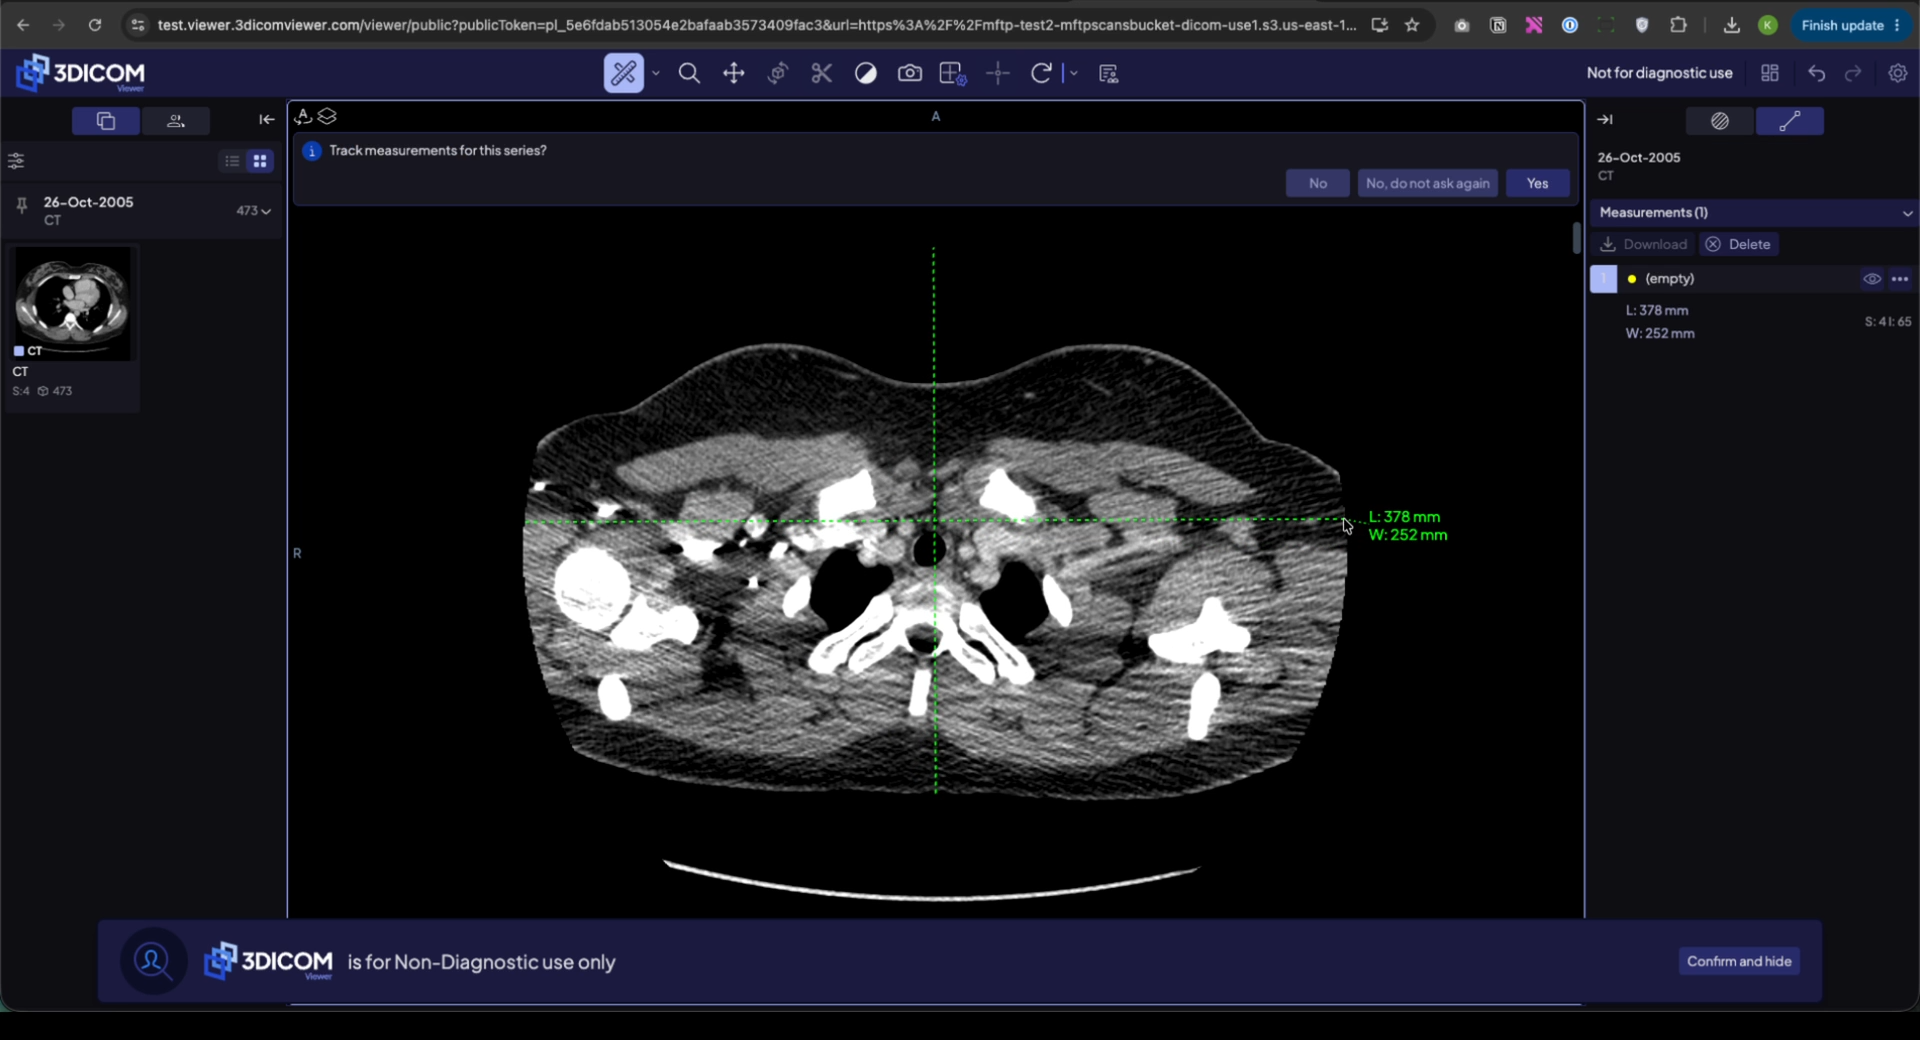
Paso 4. Clic Sí para rastrear la medición.
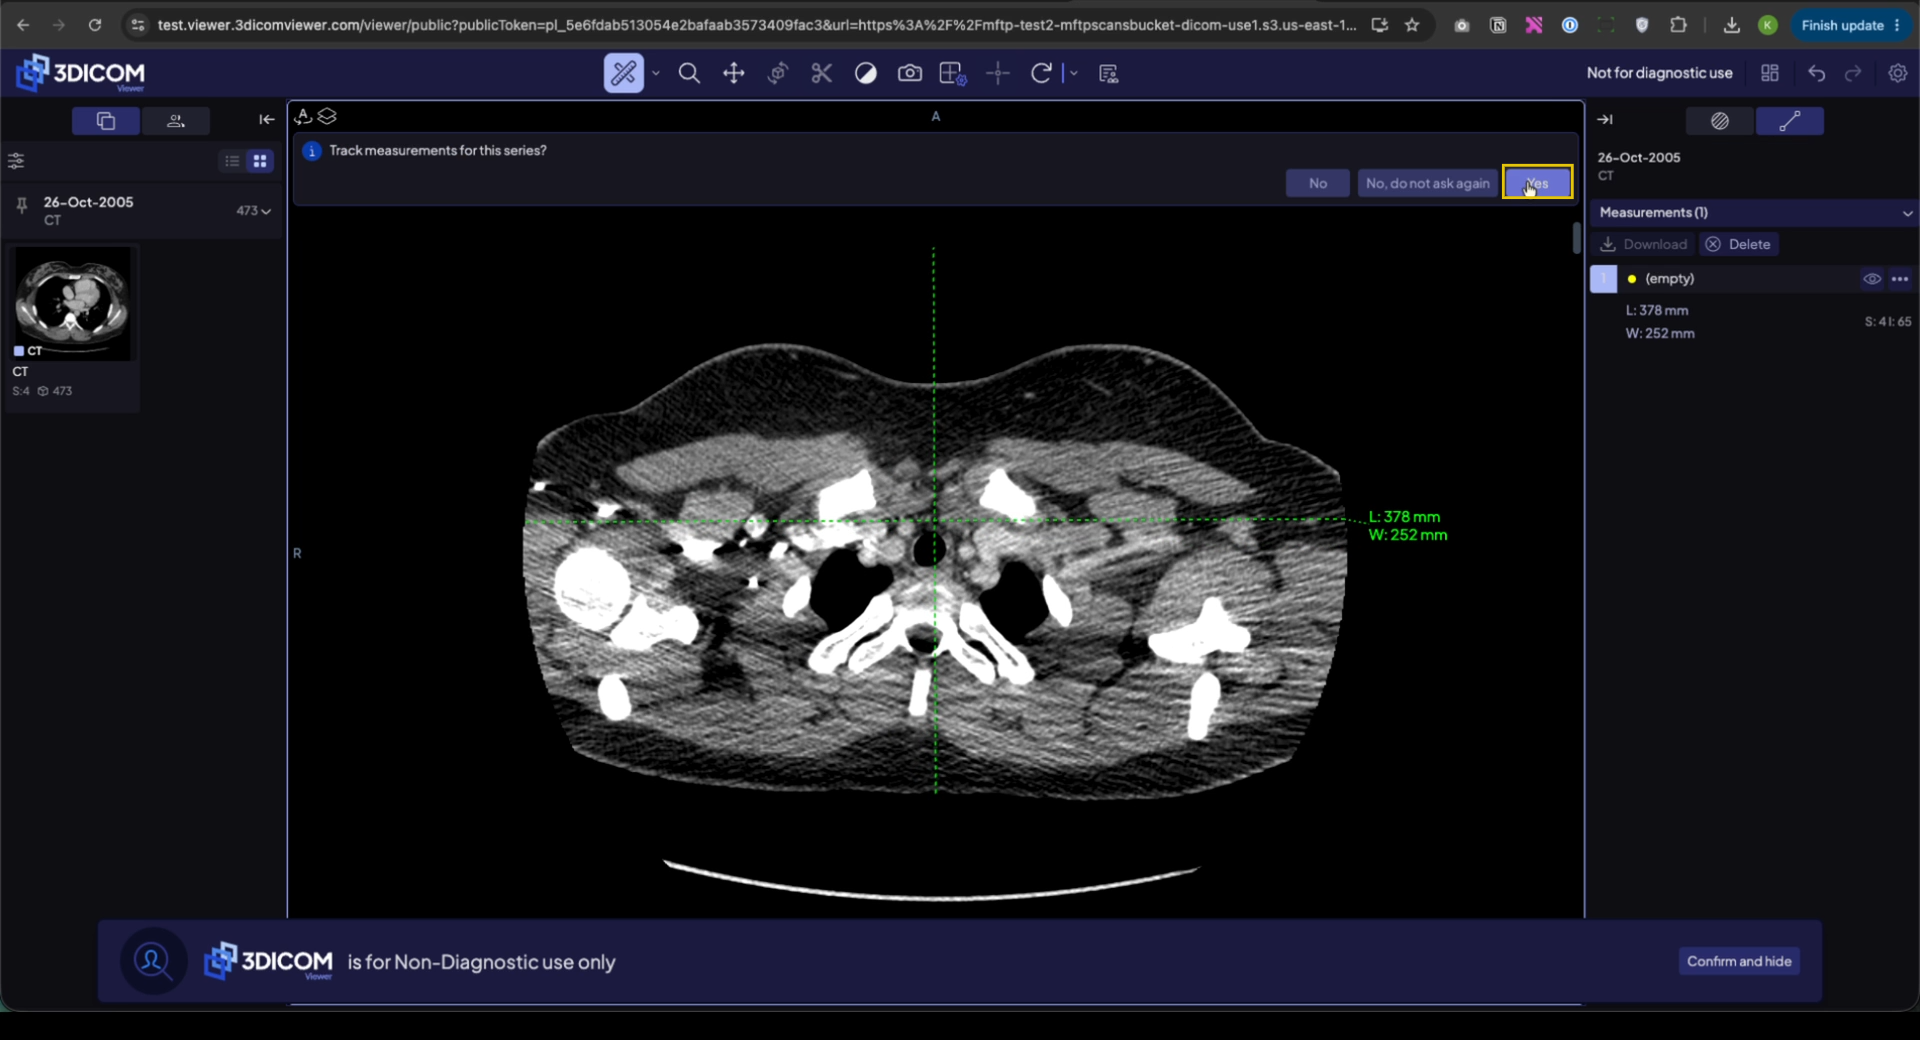
Ve los detalles de largo y ancho en la lista de la derecha. Ajusta la medida agarrando y arrastrando los manejadores si es necesario.
Agrega anotaciones a tu escaneo
Paso 5. Abrir el Barra de herramientas menú y seleccionar el Anotación herramienta.
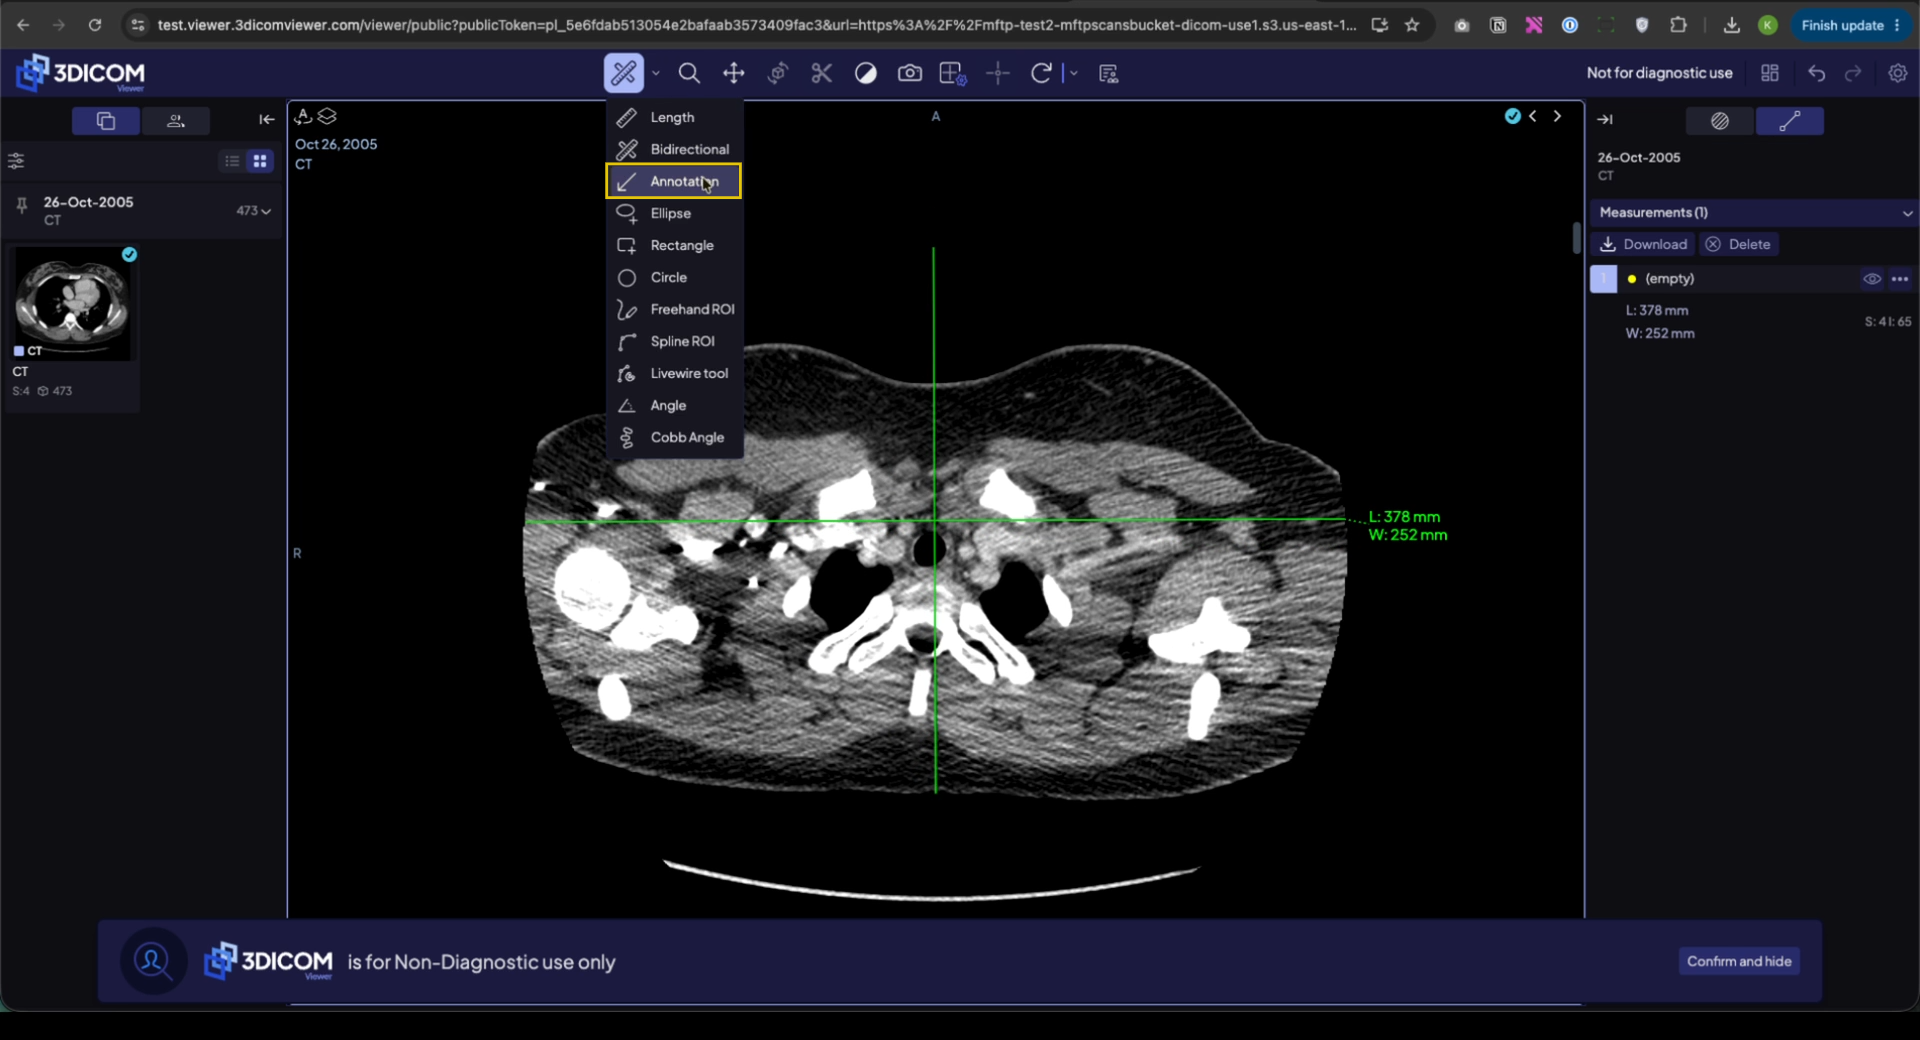
Paso 6. Haz clic en la imagen para colocar la anotación, apunta y escribe tu nota.
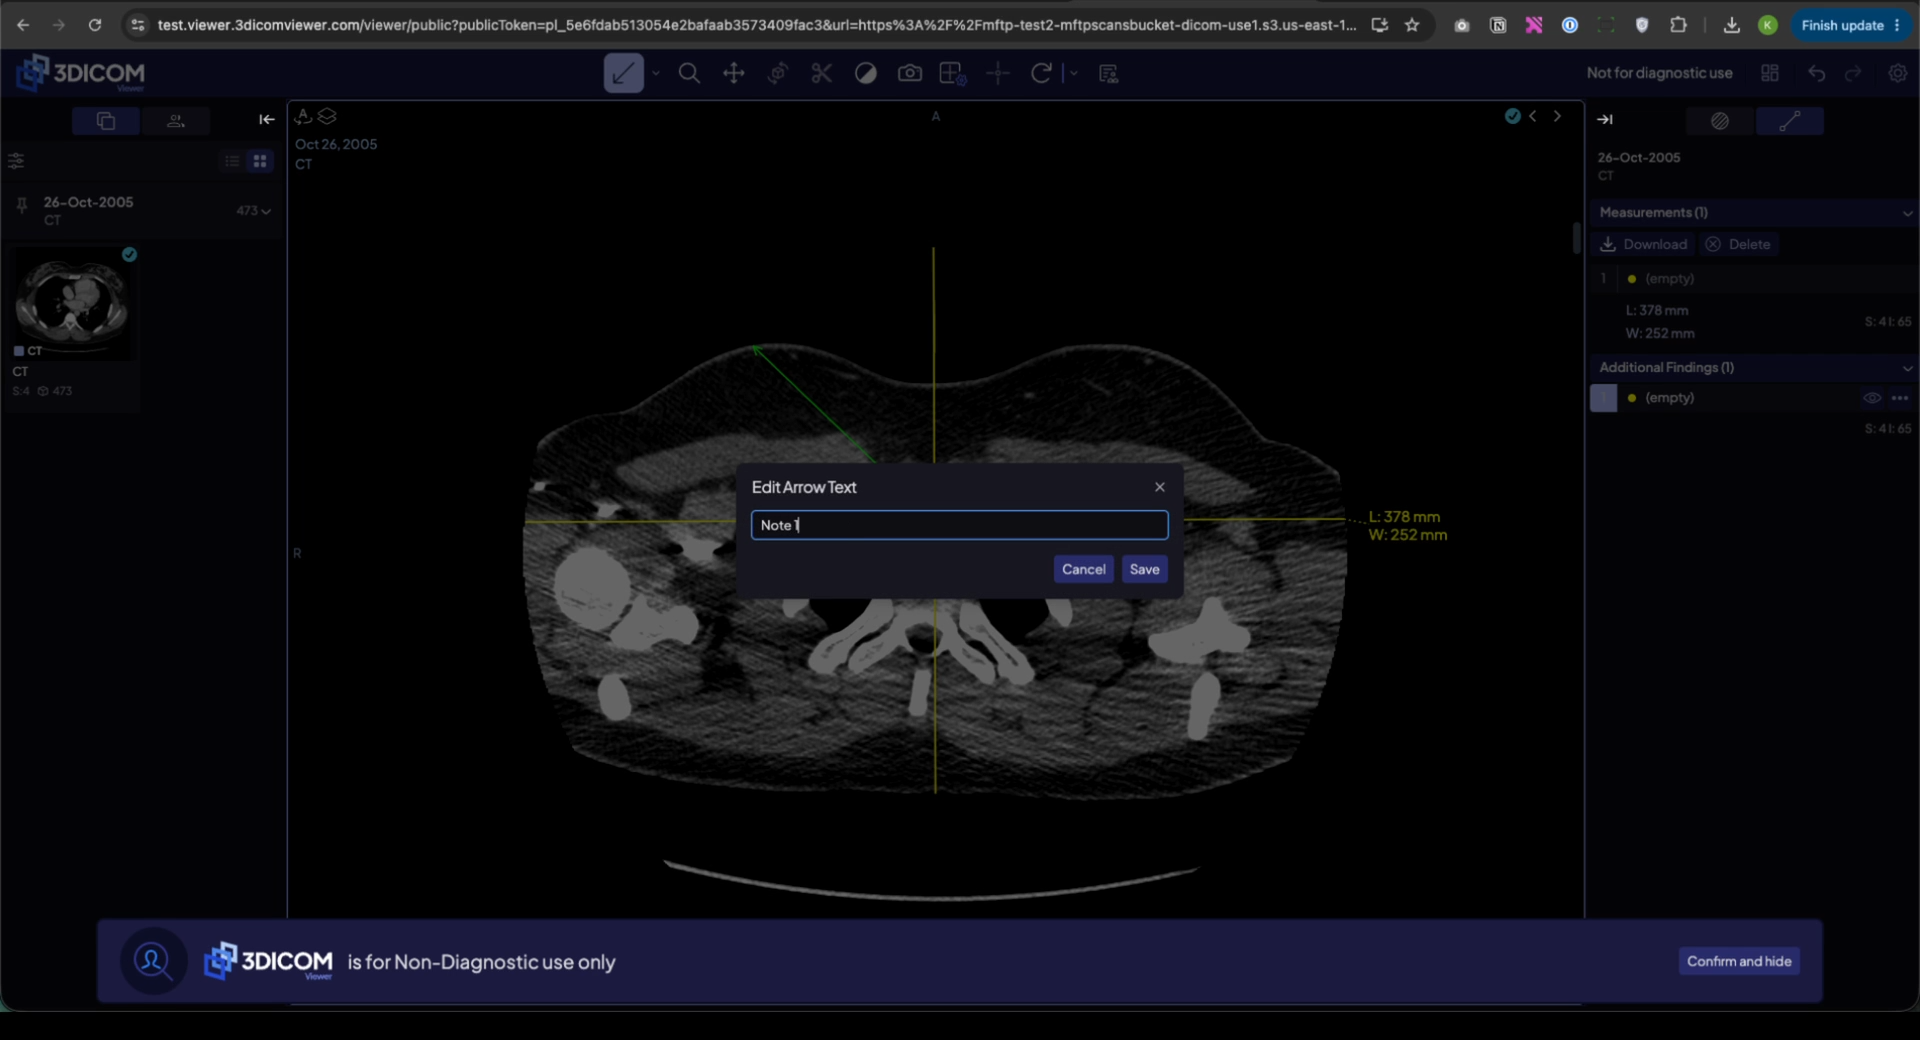
Revisa tu anotación en la lista de hallazgos de la derecha.
Explorar diseños de escaneo y opciones de visualización
Paso 1. Abrir el Diseño menú y cambiar entre vista única, paneles múltiples o 3D visitas según sea necesario.
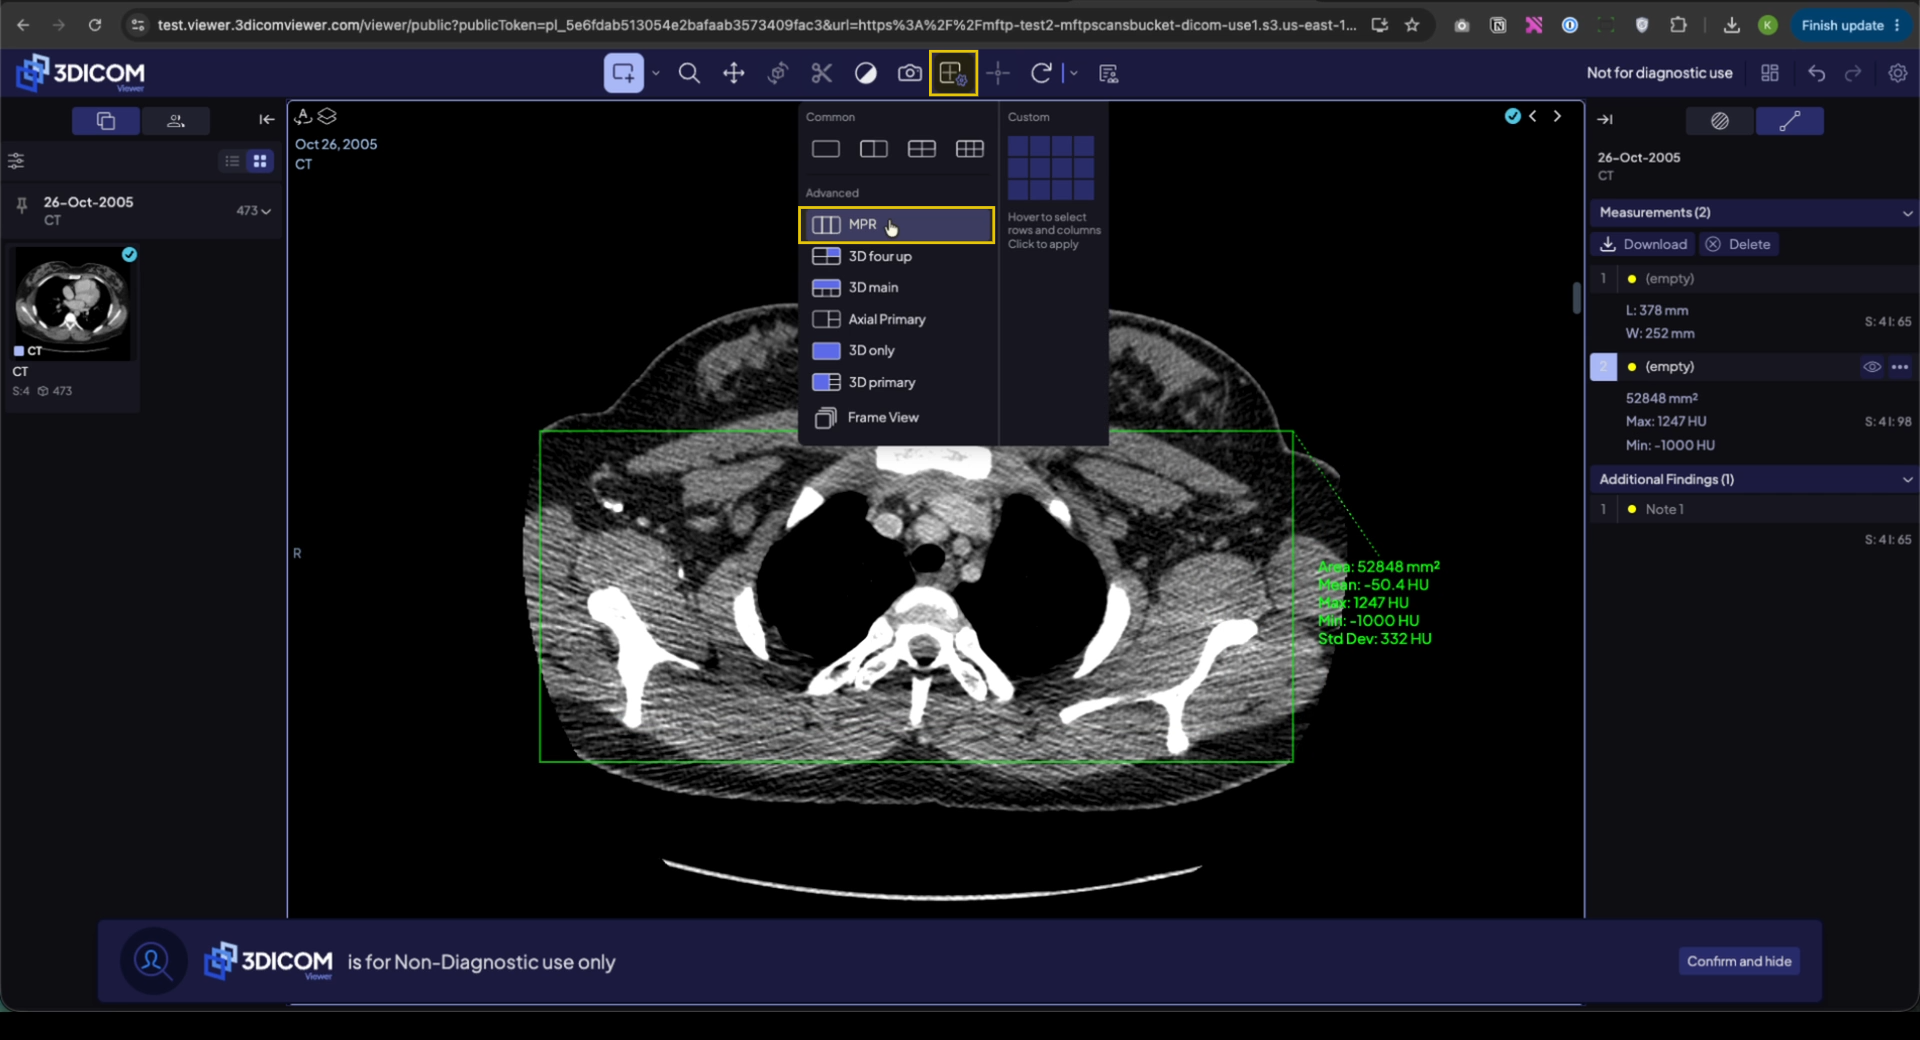
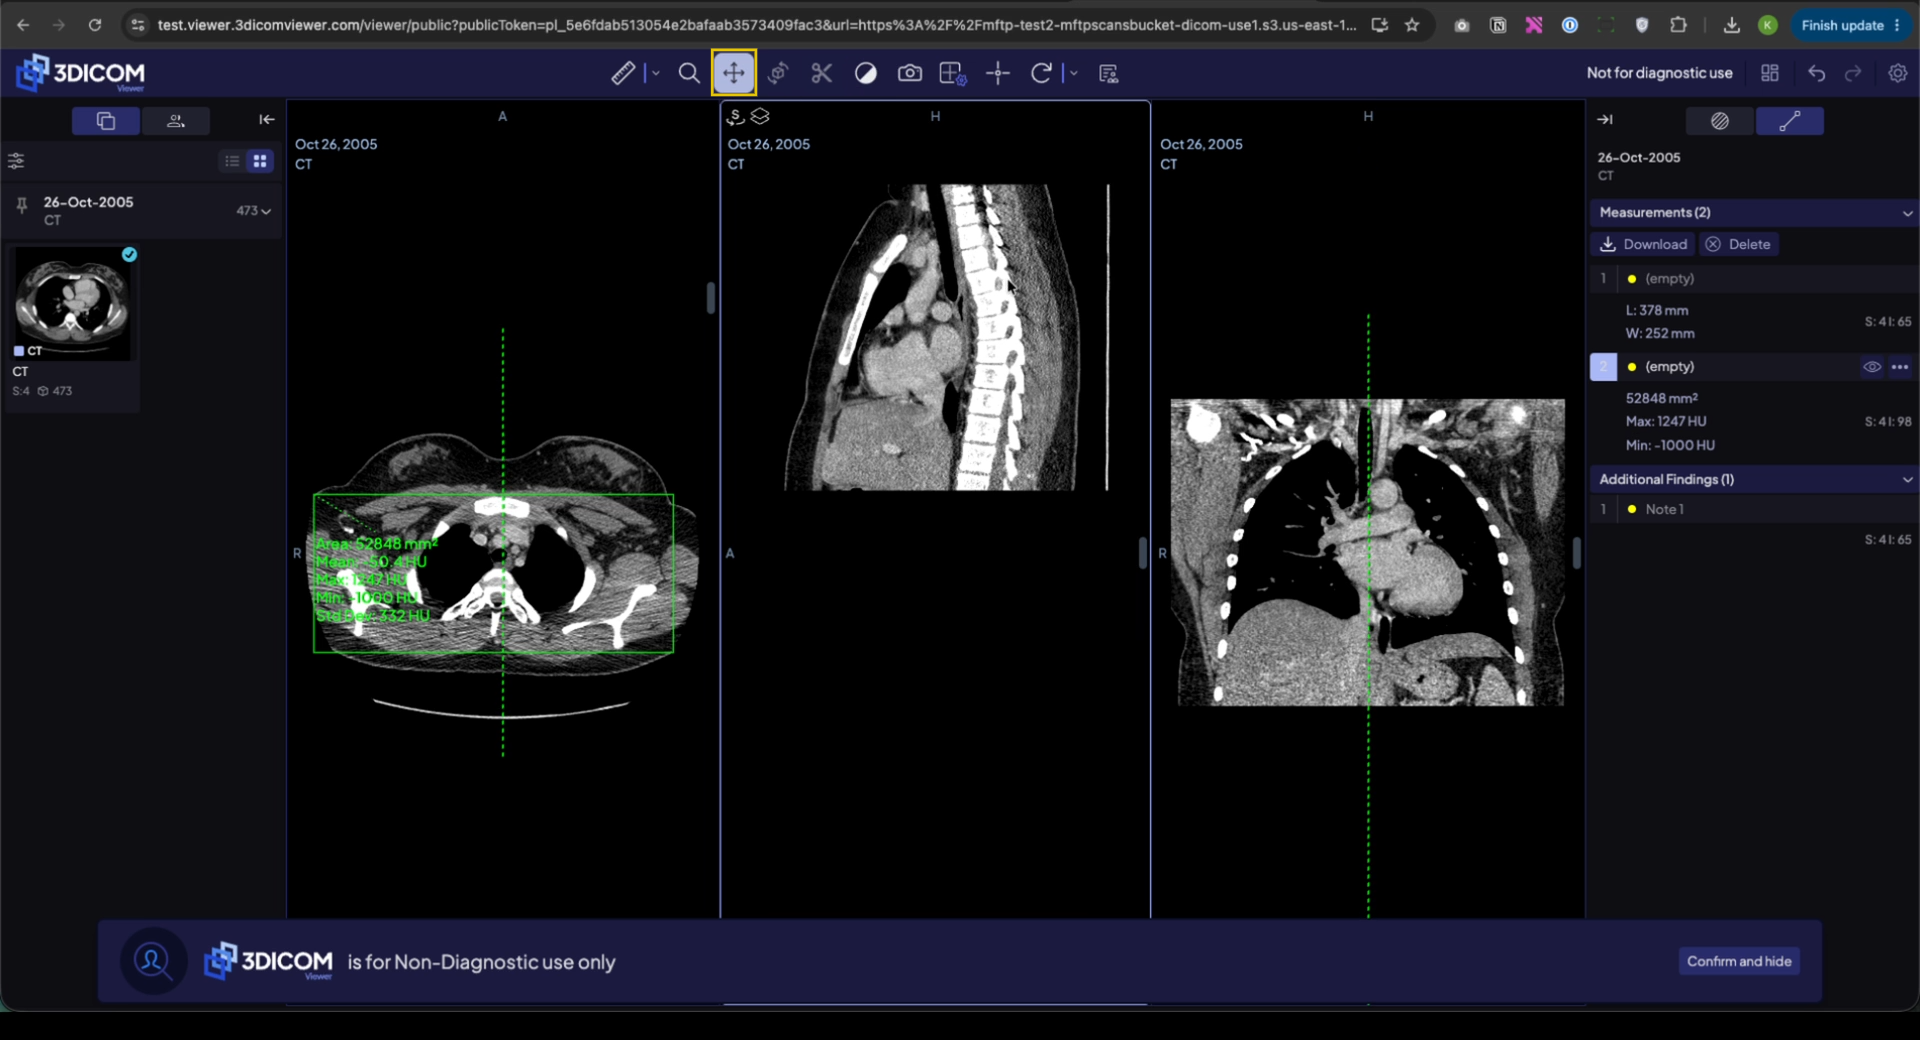
Paso 2. Usa el ratón para desplazarte y arrastrar dentro de cada panel.
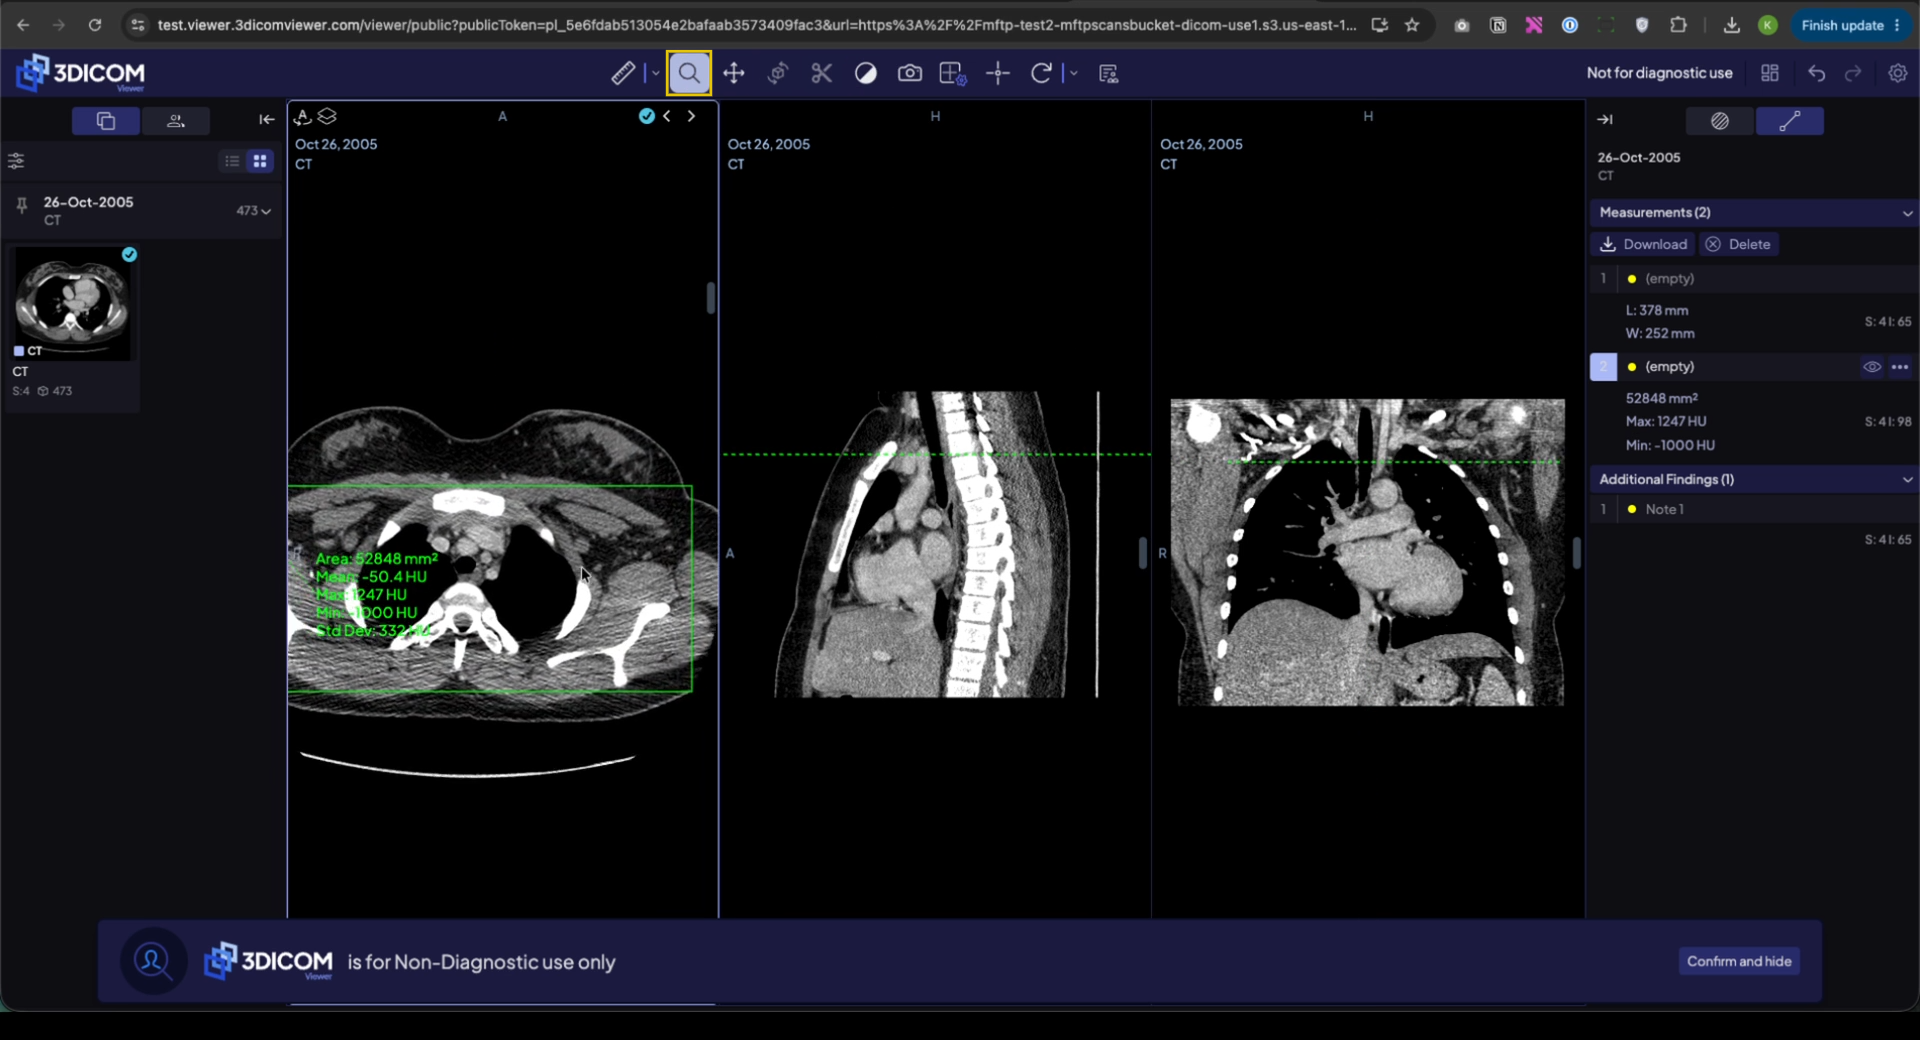
Paso 3. Seleccione el Zoom Herramienta para enfocar detalles de imágenes.
Paso 4. Usar Ventana para ajustar los niveles de contraste.
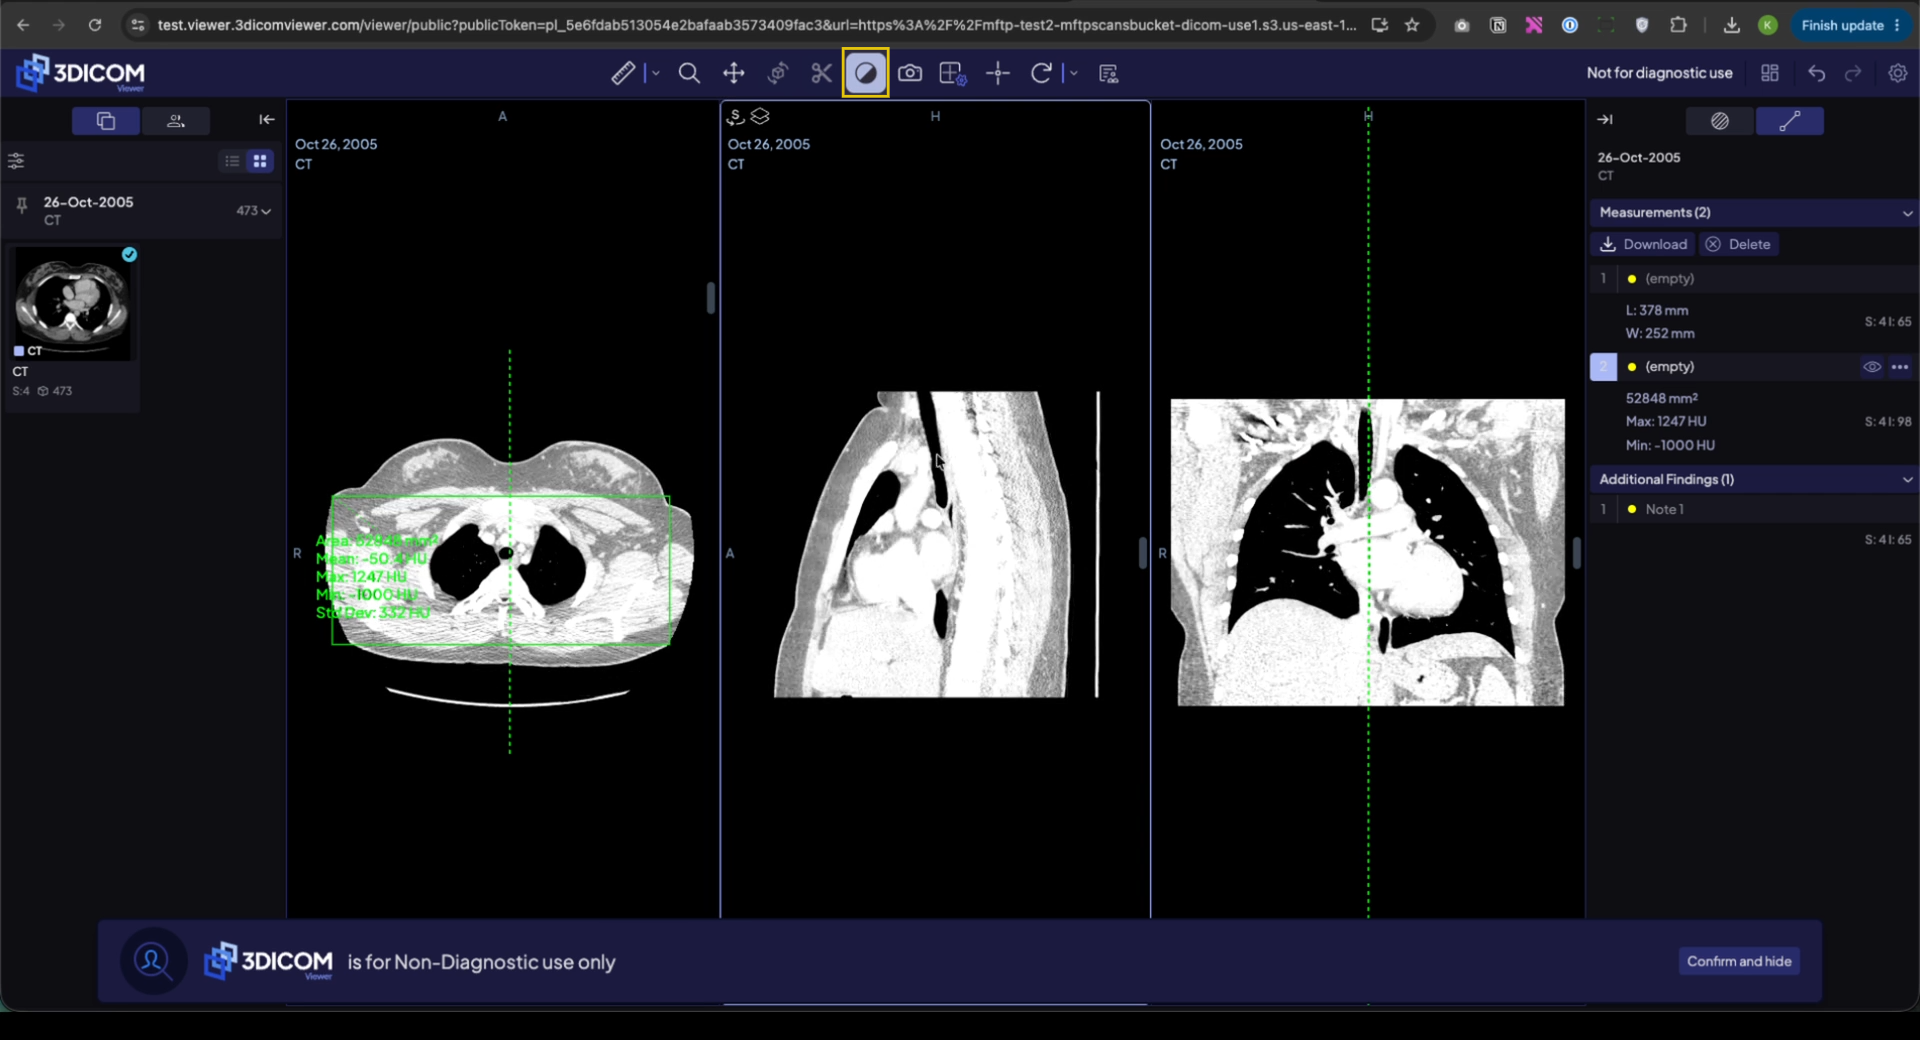
Paso 5. Cambia la orientación de cada panel (axial, sagital o coronal) mediante el control situado en la esquina superior izquierda.
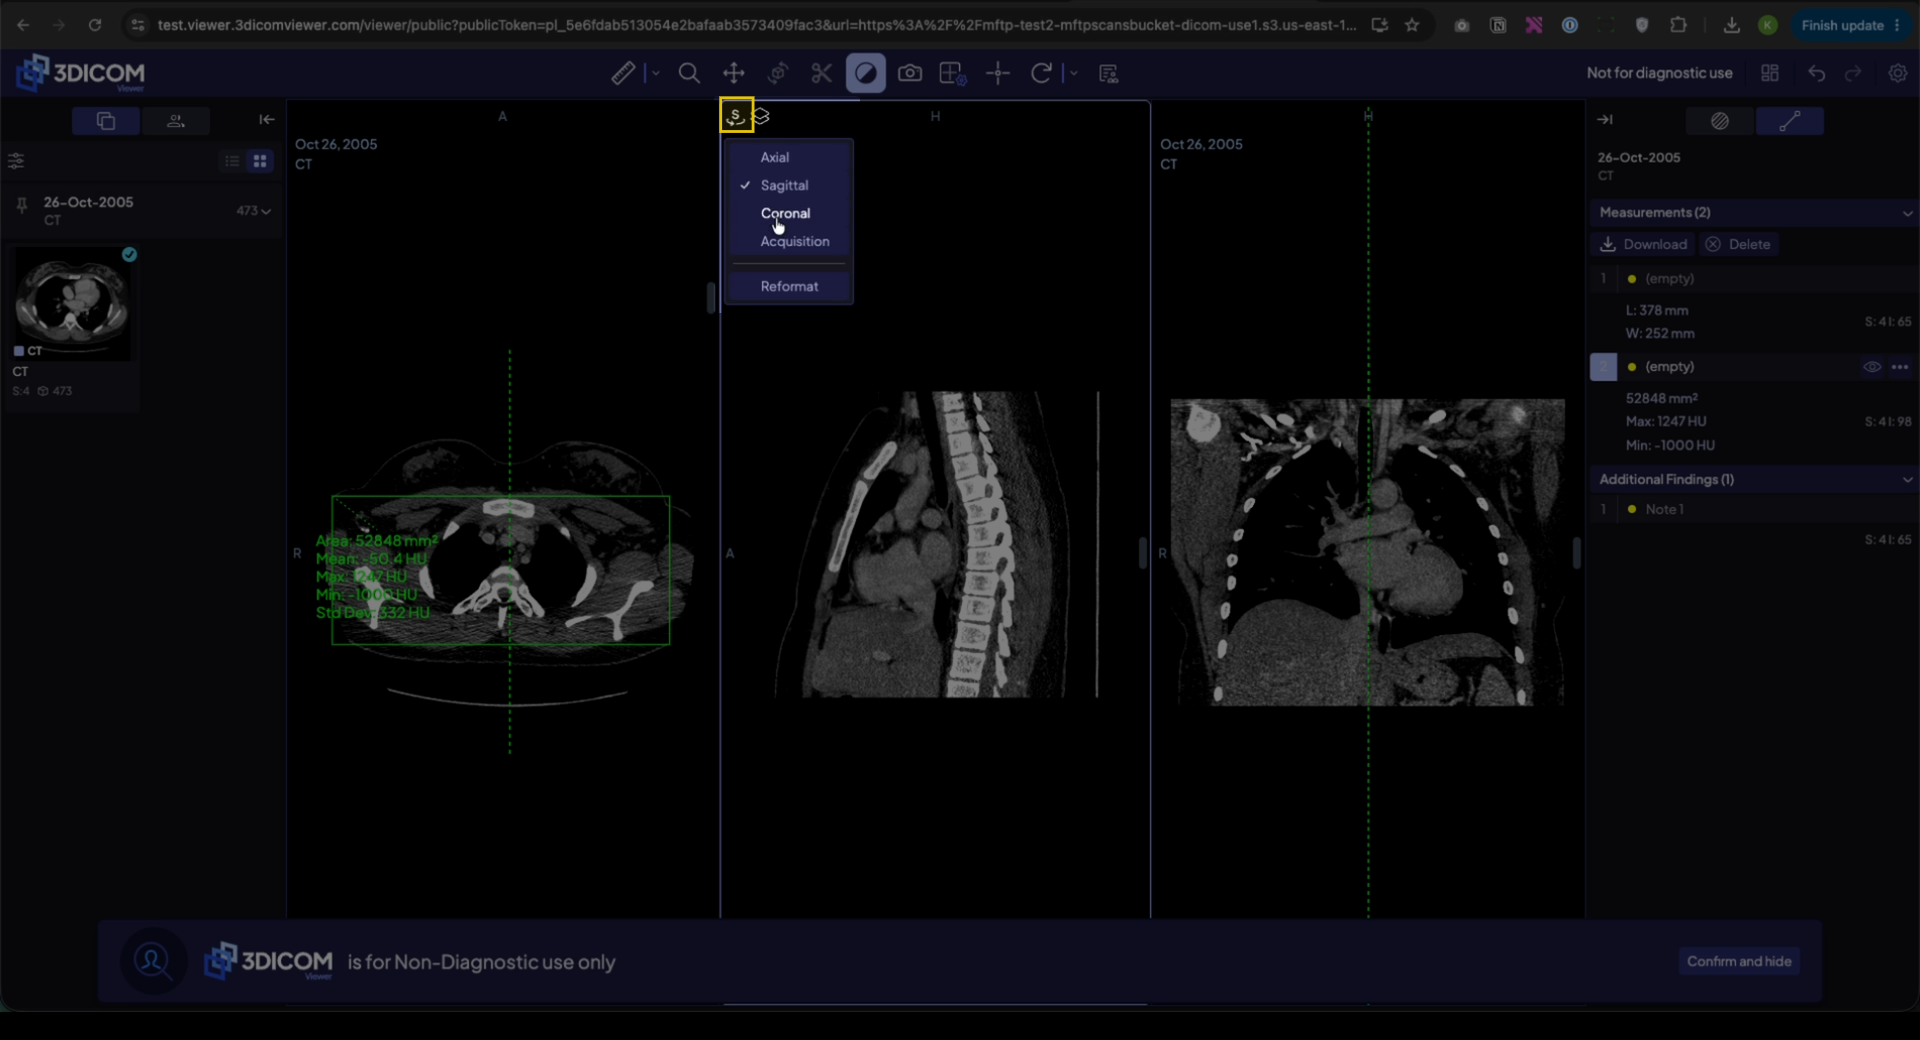
Ver e interactuar con el escaneo en 3D
Paso 1. En el Diseño Menú, seleccionar el completo Solo 3D modo de renderizado.
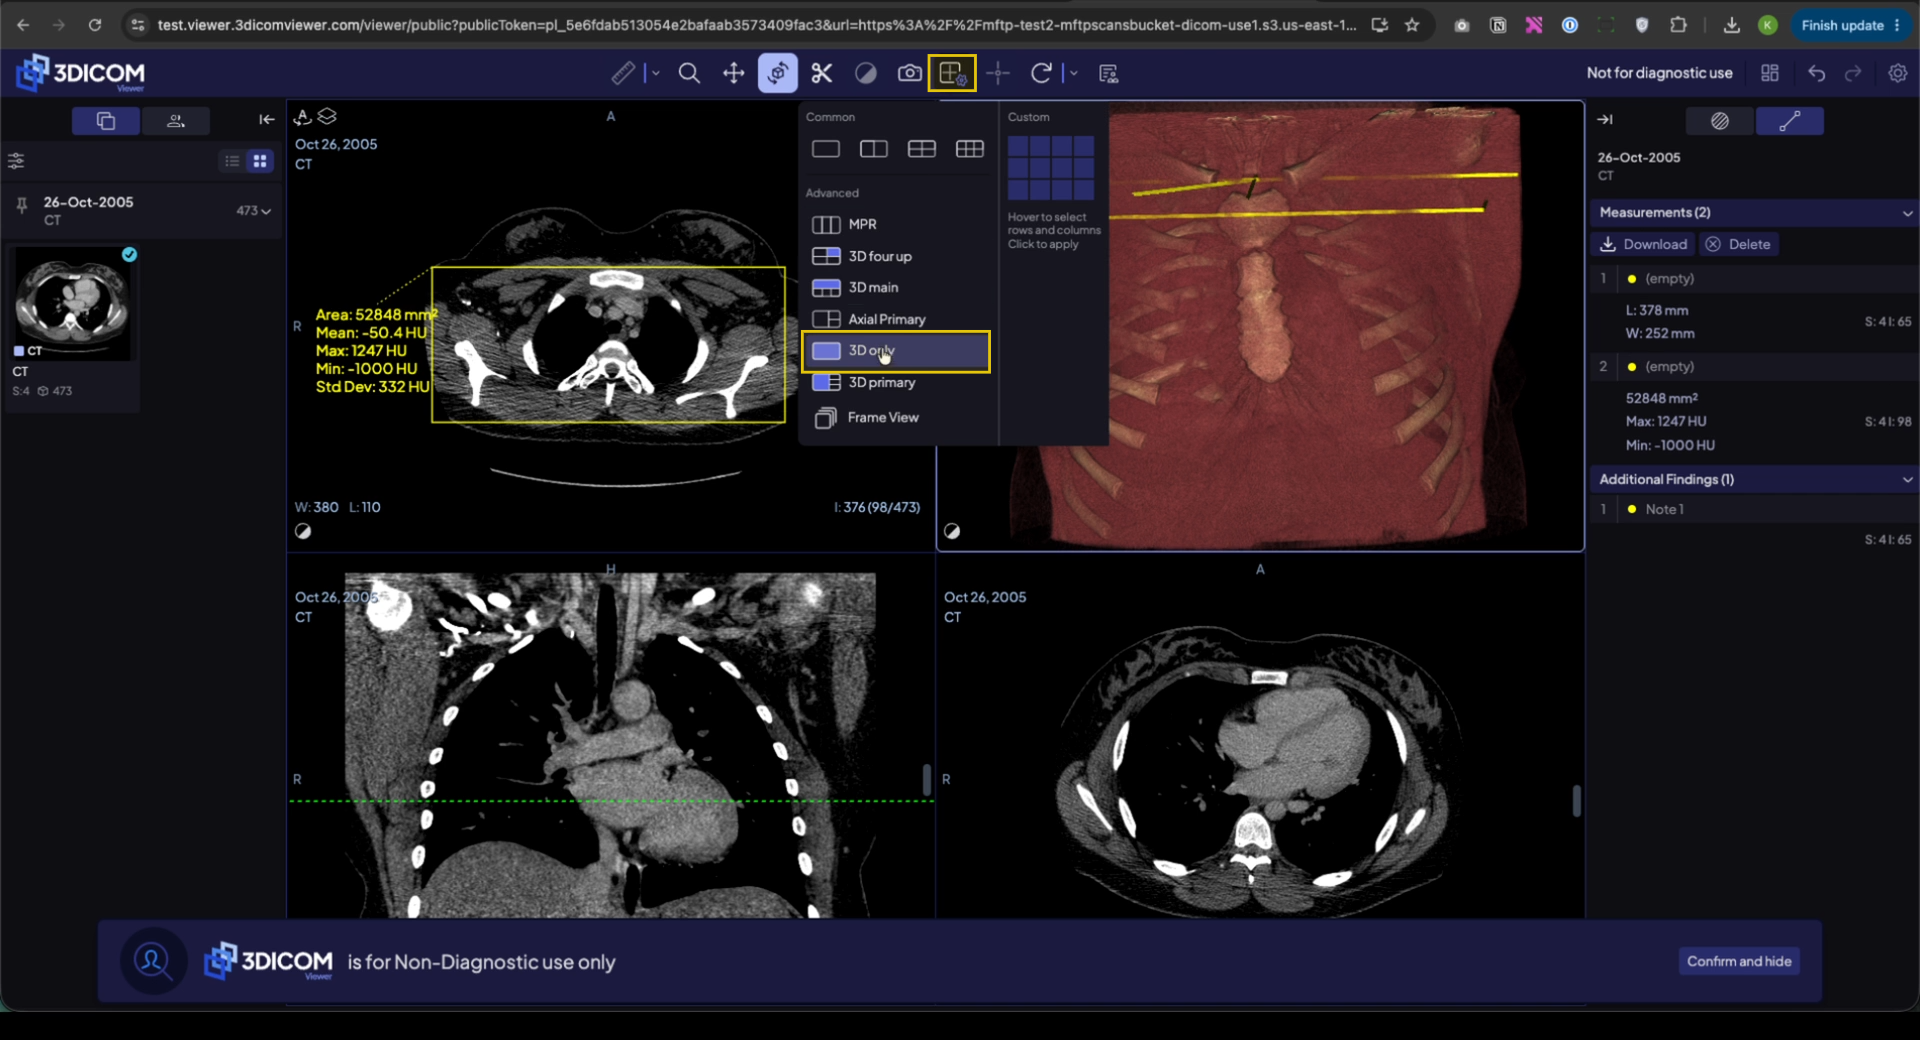
Paso 2. Rota, amplía y cambia el ángulo de visión directamente en la representación 3D.
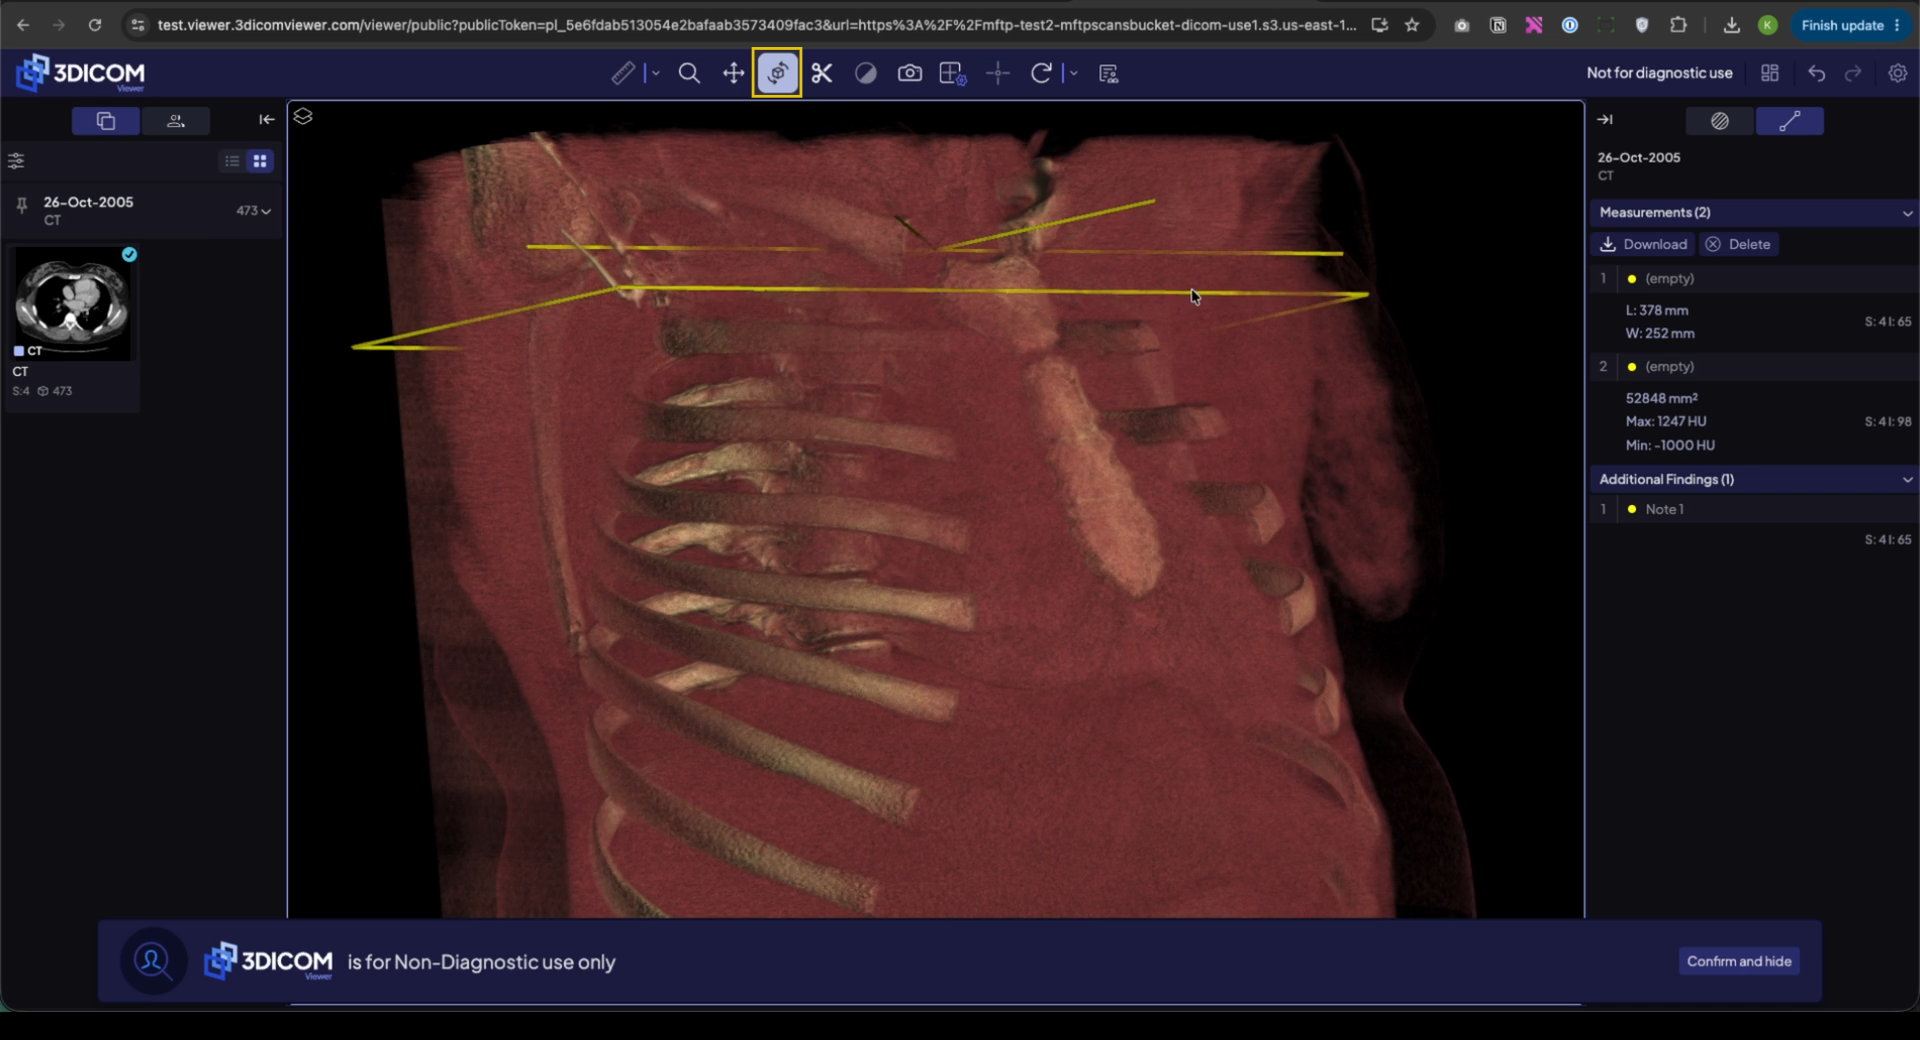
Paso 3. Seleccionar Corte 3D para convertir la pila de imágenes en un modelo 3D interactivo que puedas manipular dentro del espacio de trabajo.
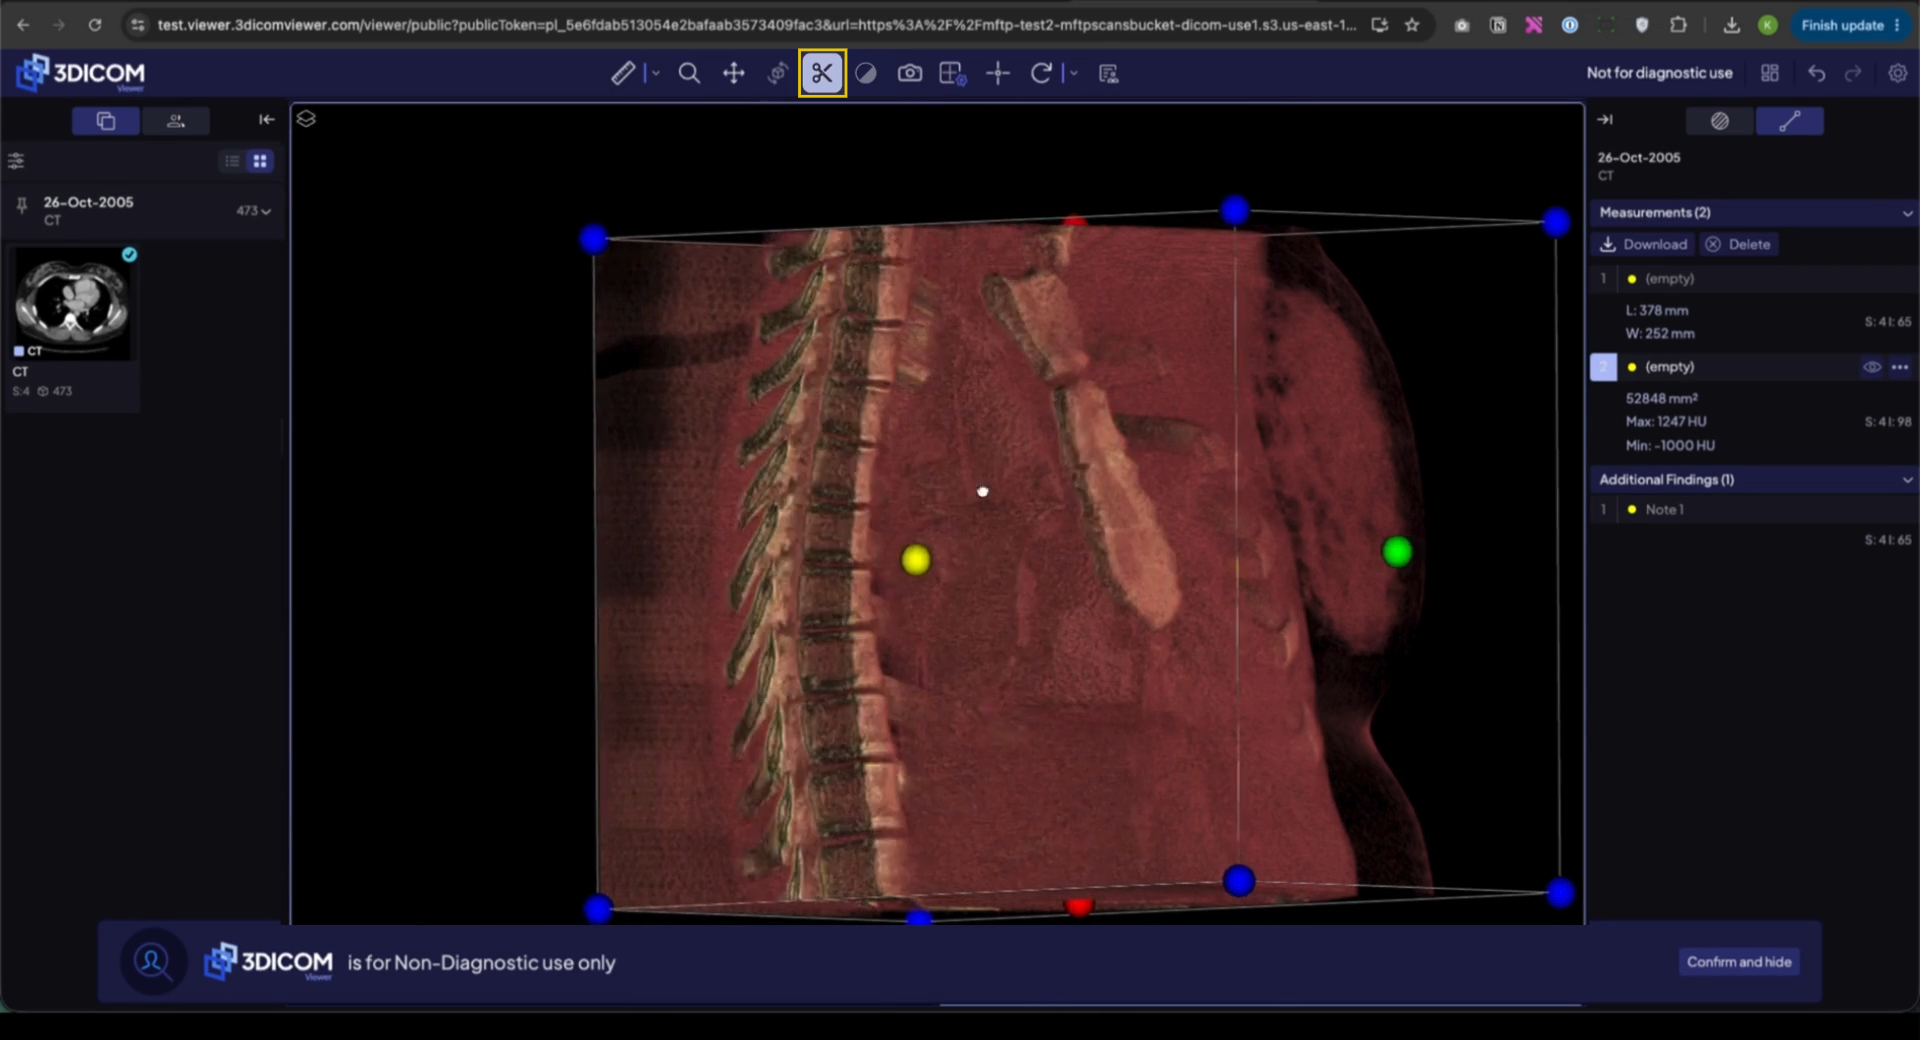
Resultado
Habrás medido y anotado tu escaneo y aprendido a explorarlo en modos multivisualización y 3D completo en 3DICOM.