How to Manage & Delete Patient Folders & Studies in 3DICOM
Overview
This guide explains how to manage patient records in the 3DICOM platform. You’ll learn how medical imaging records are organized, how to apply custom names to patient folders and studies, and how to delete files when they are no longer needed.
Understanding the record structure
Medical imaging records in 3DICOM are organized in a hierarchical tree:
Patient Folder at the top level
Each patient folder contains one or more Studies
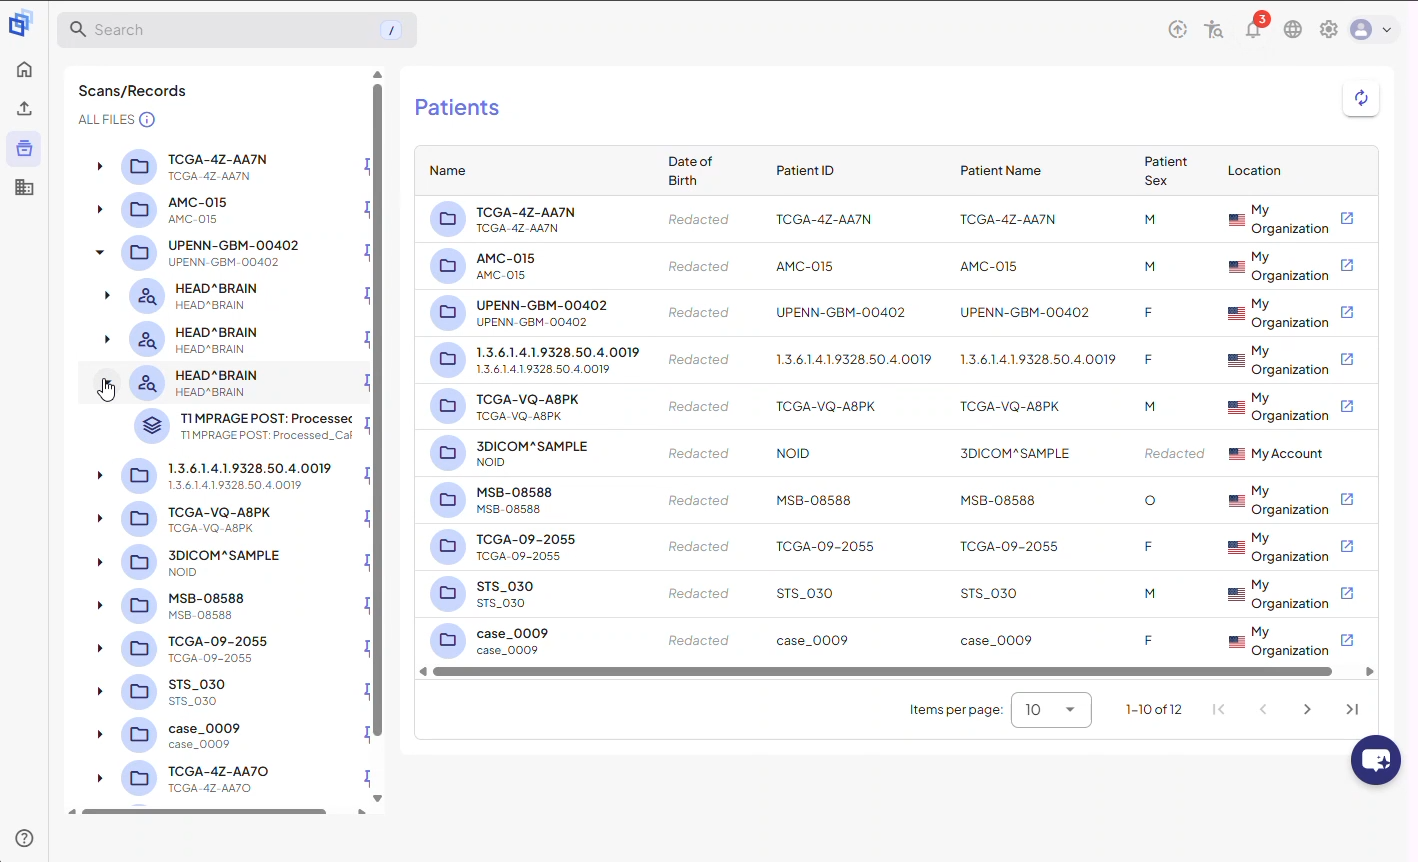
Each study contains one or more Series, which are sets of images from a single appointment
These sections allow you to efficiently organize, search, and manage imaging records.
Step-by-step instructions
Access patient records
Step 1. Click the Scans and Records option on the sidebar.
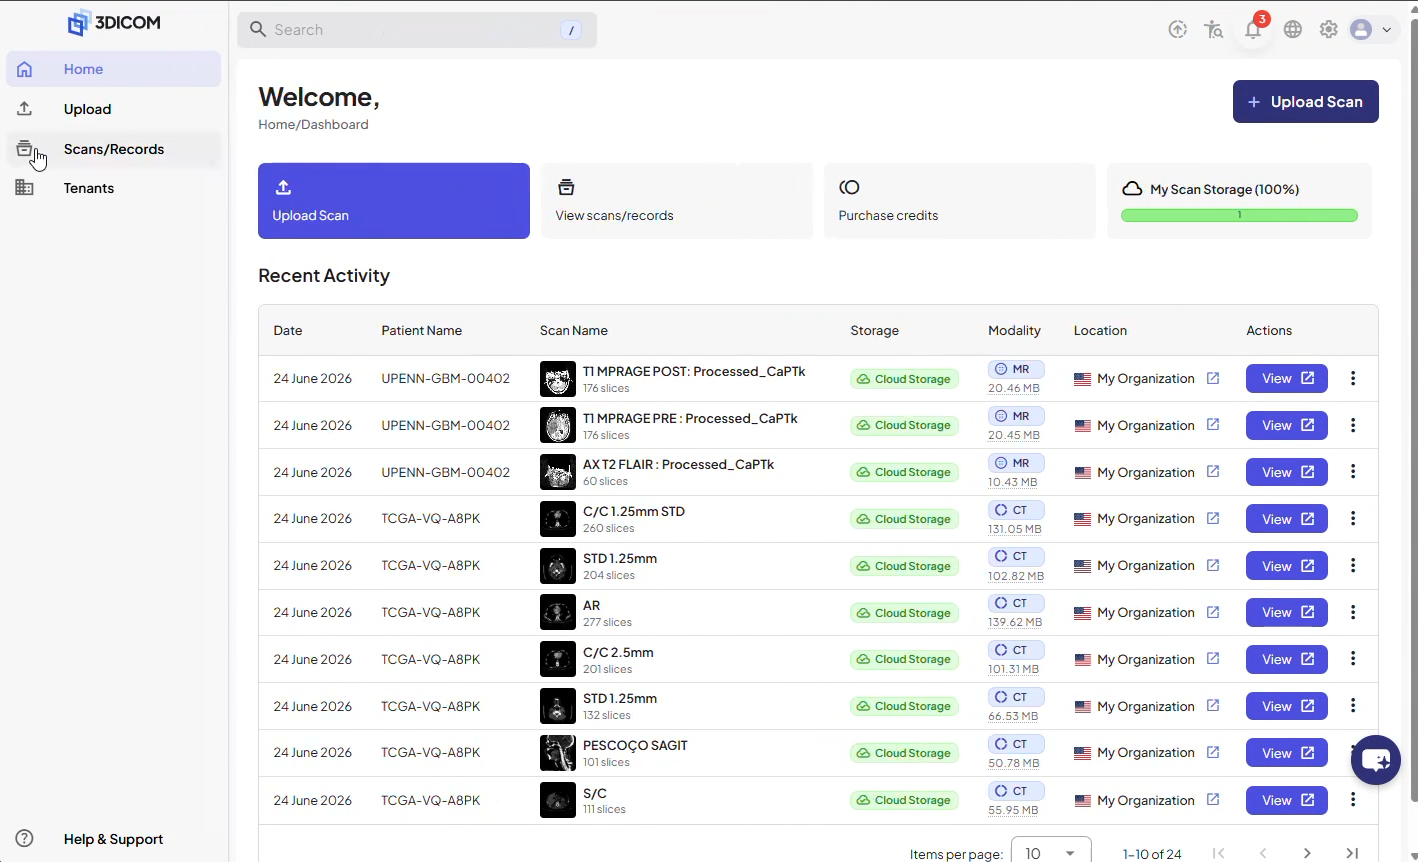
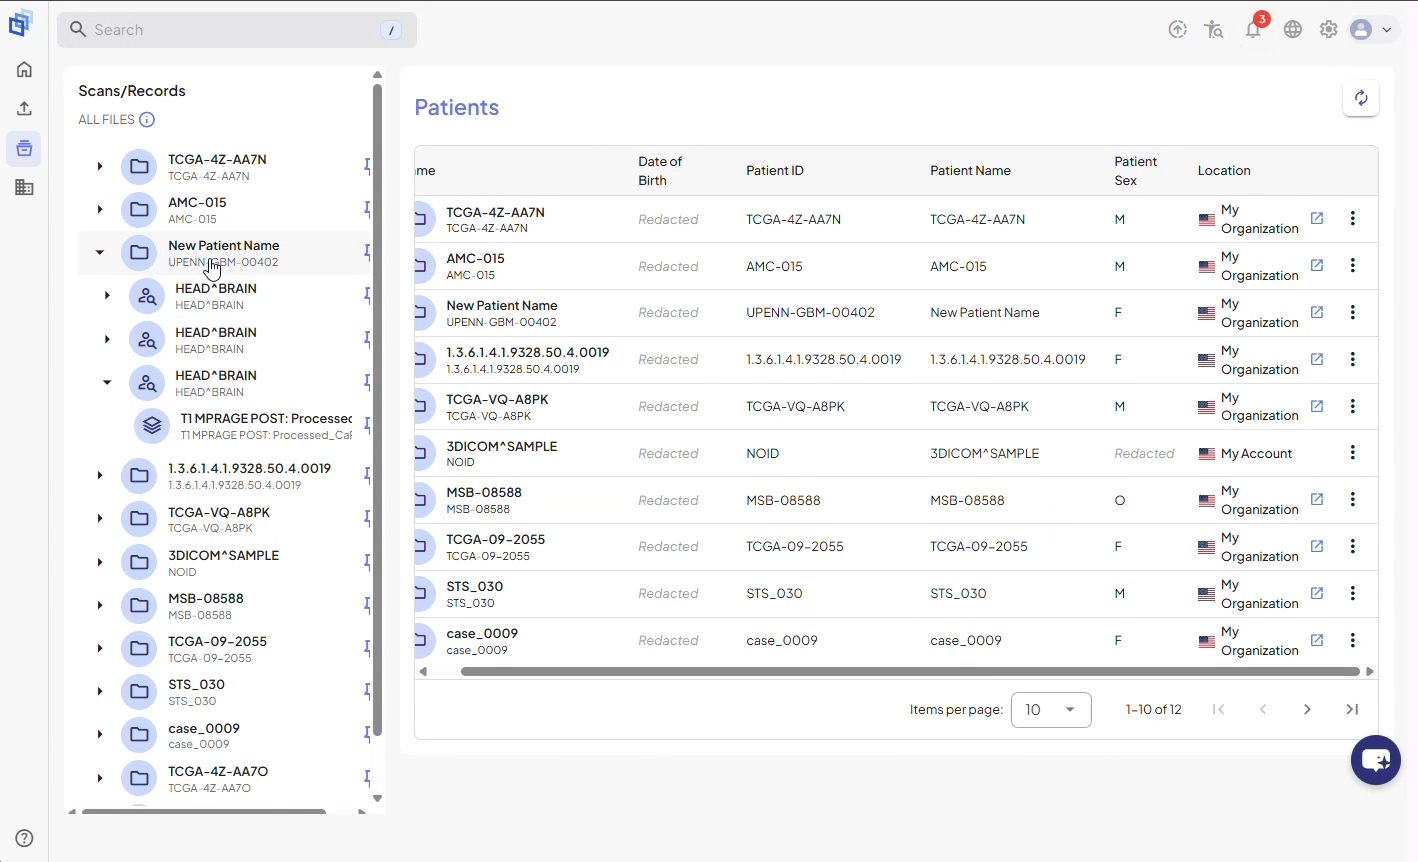
Step 2. Review all imaging files and folders available to you, including those in your personal account and any additional tenants.
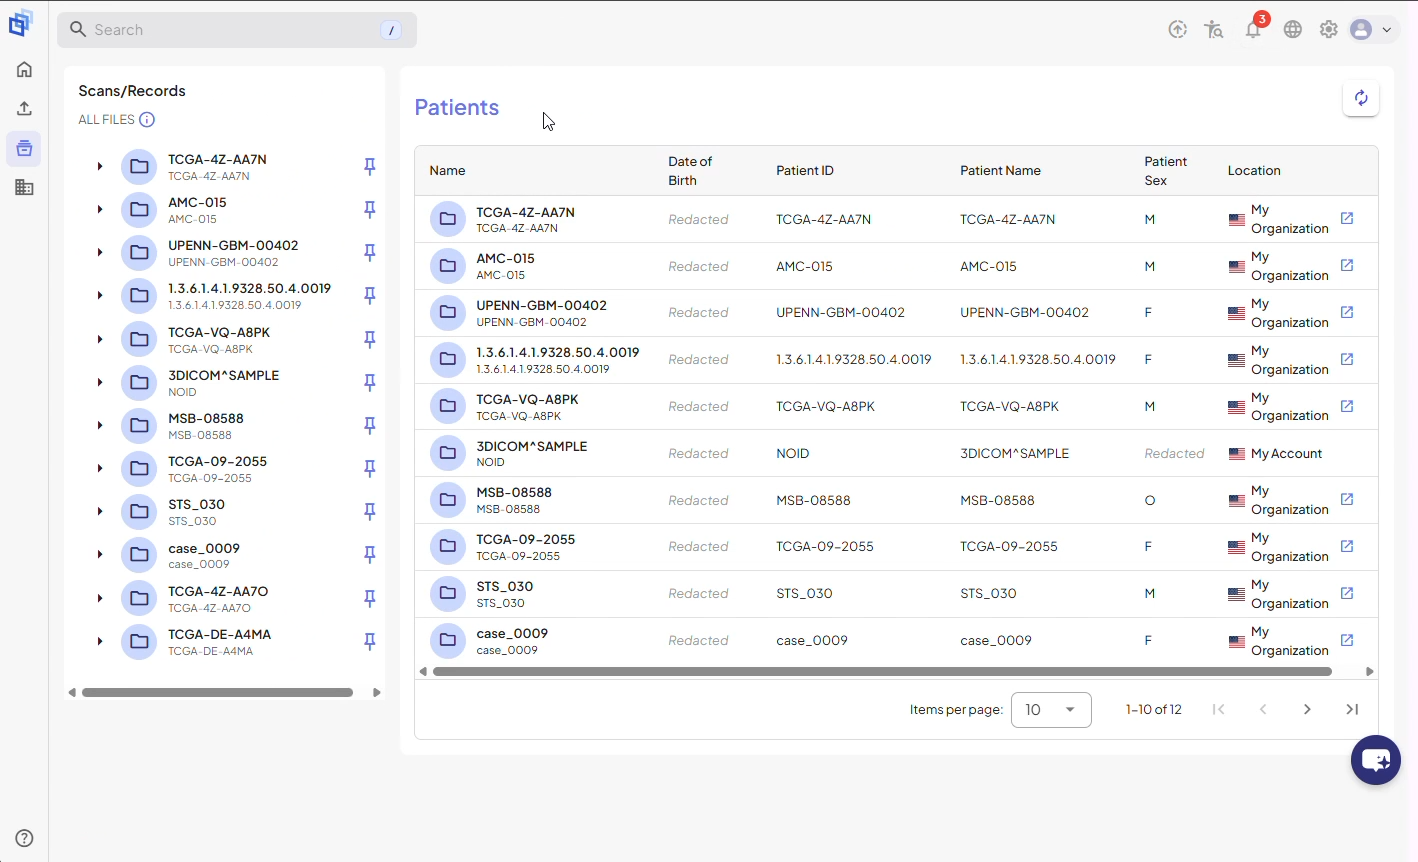
Step 3. Familiarise yourself with the platform’s navigation tree, which displays all patient folders at the top level.
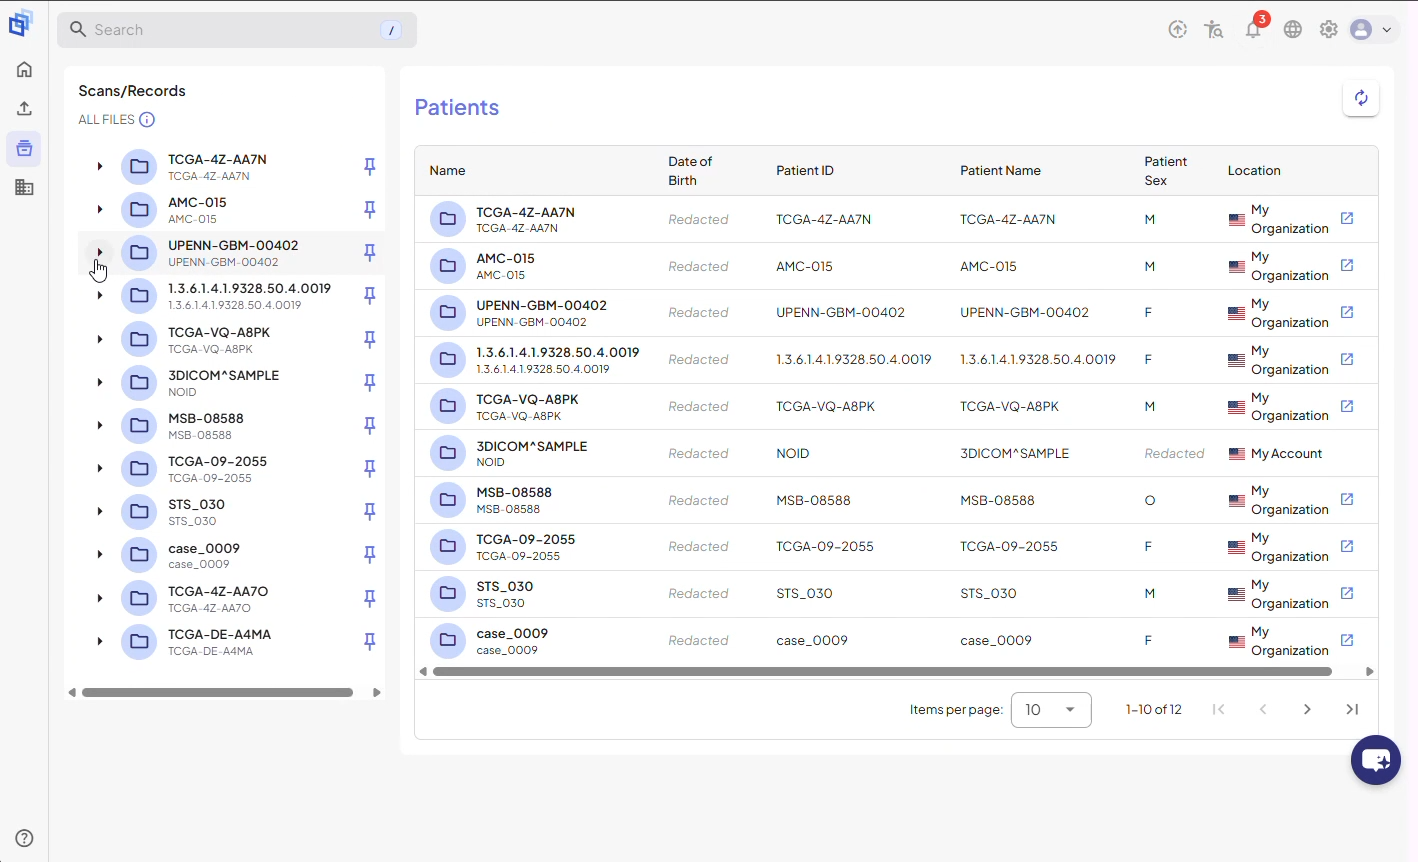
Step 4. Note that each patient folder can contain multiple studies.
Change the name of a patient folder
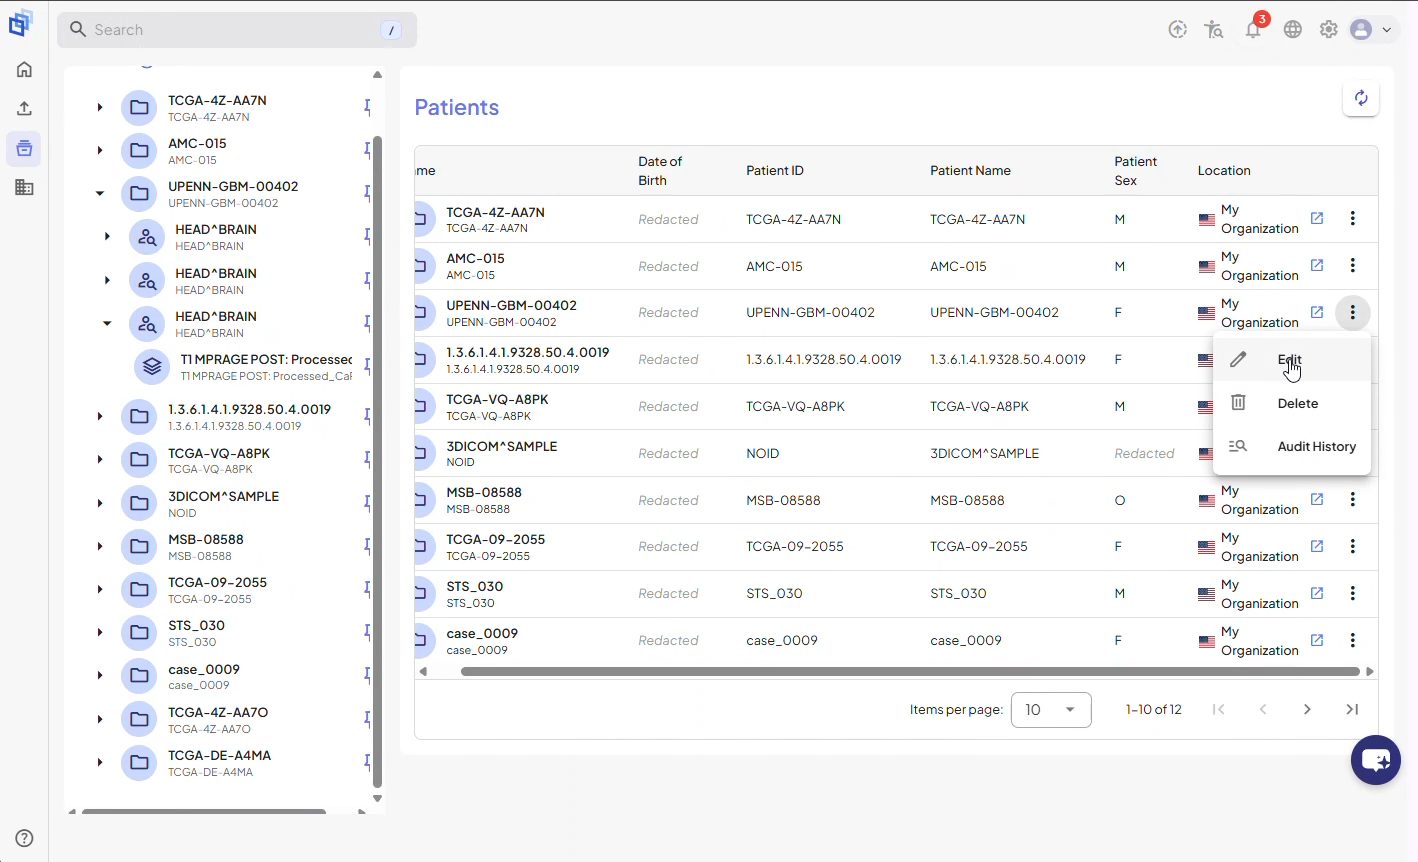
Step 5. Locate a patient record in the Patients table and click the three-dots menu on the right side of the row.
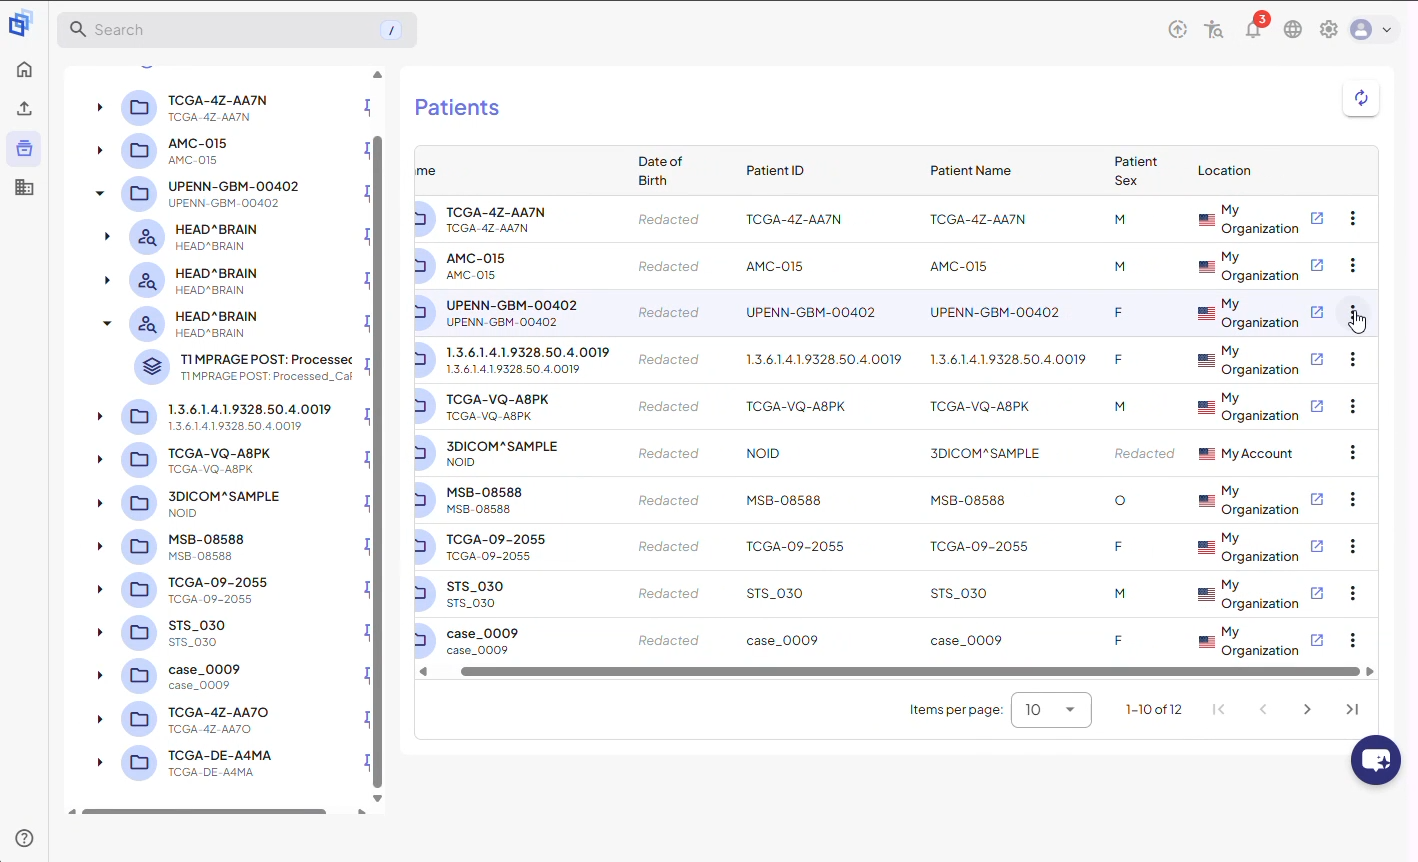
Step 6. Select Edit from the menu to open the Edit Folder Name dialog.
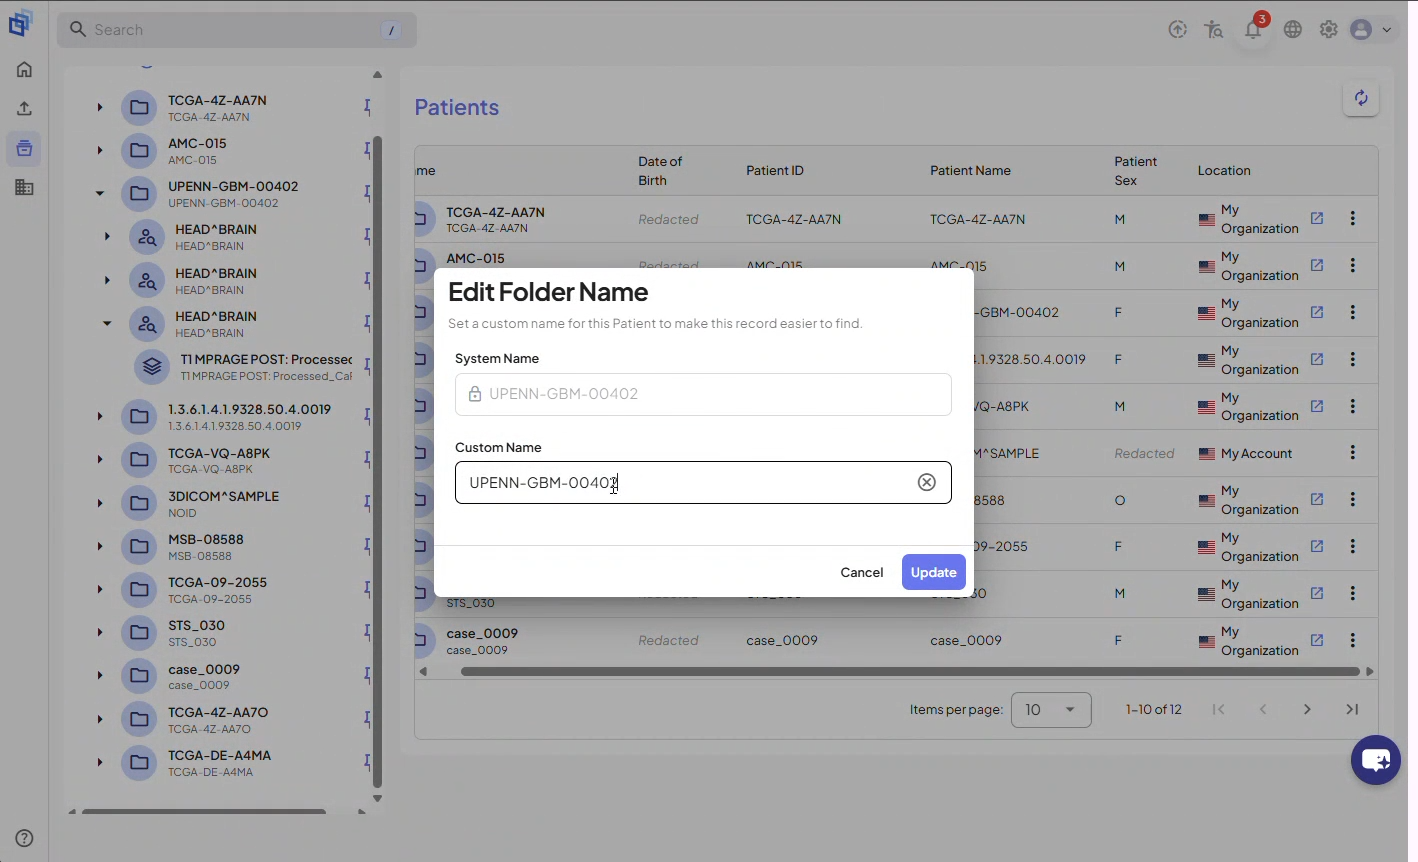
Step 7. Click into the custom name text field, replace the existing name with your preferred folder name, and click Update to finalise your change.
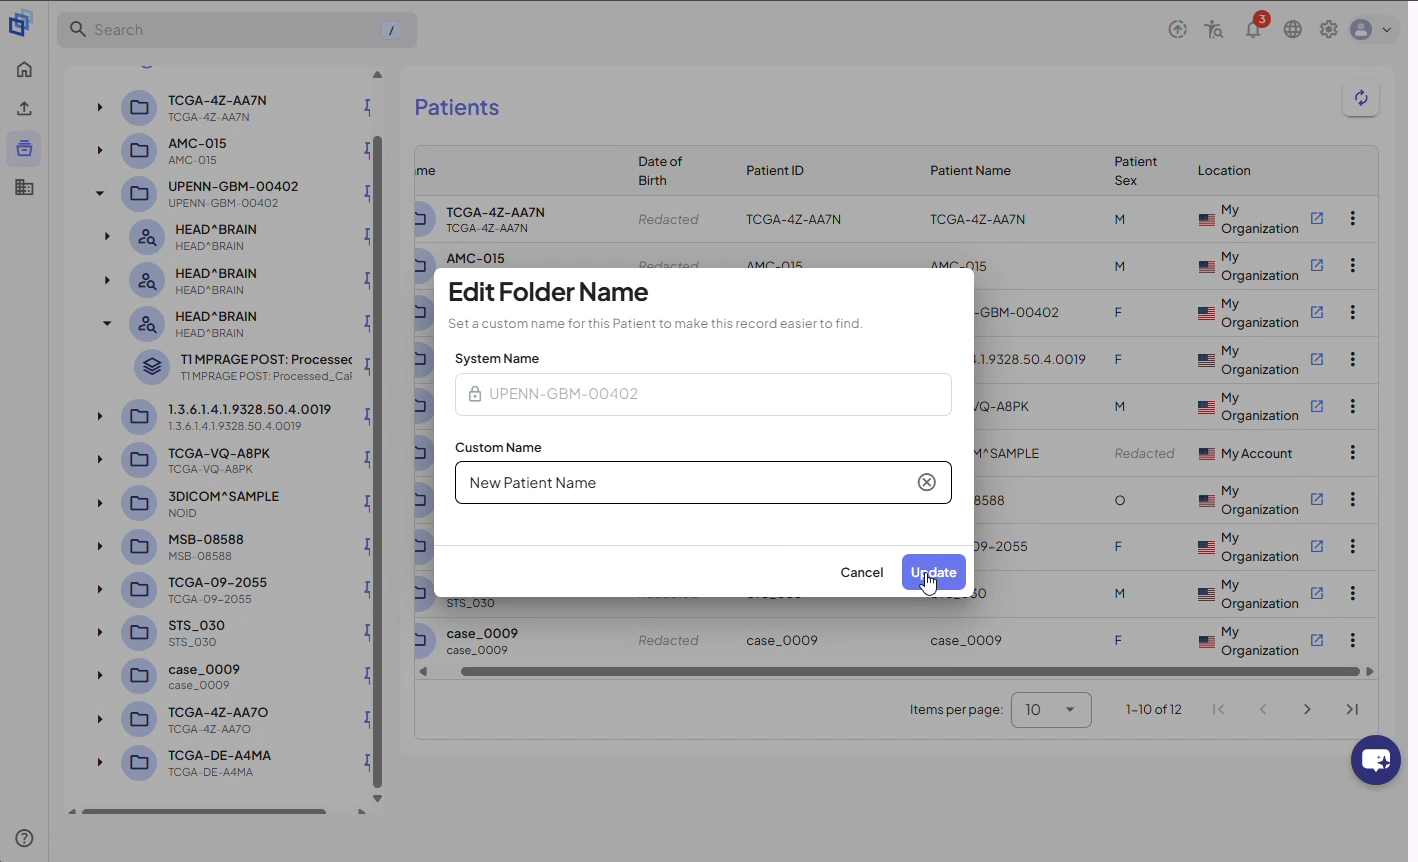
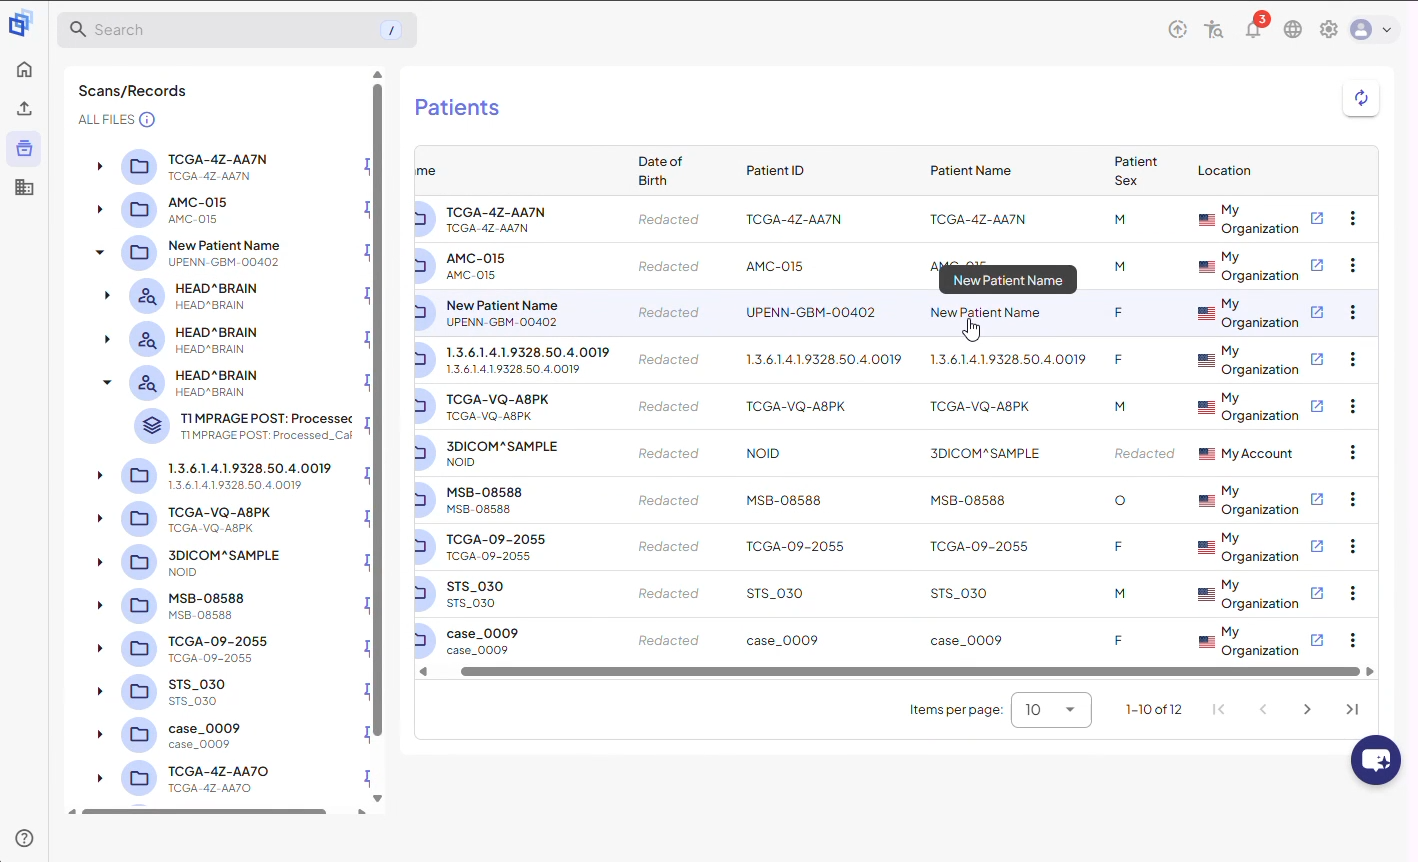
Step 8. The updated patient folder name will appear in the navigation tree and in the Patients table.
Rename studies
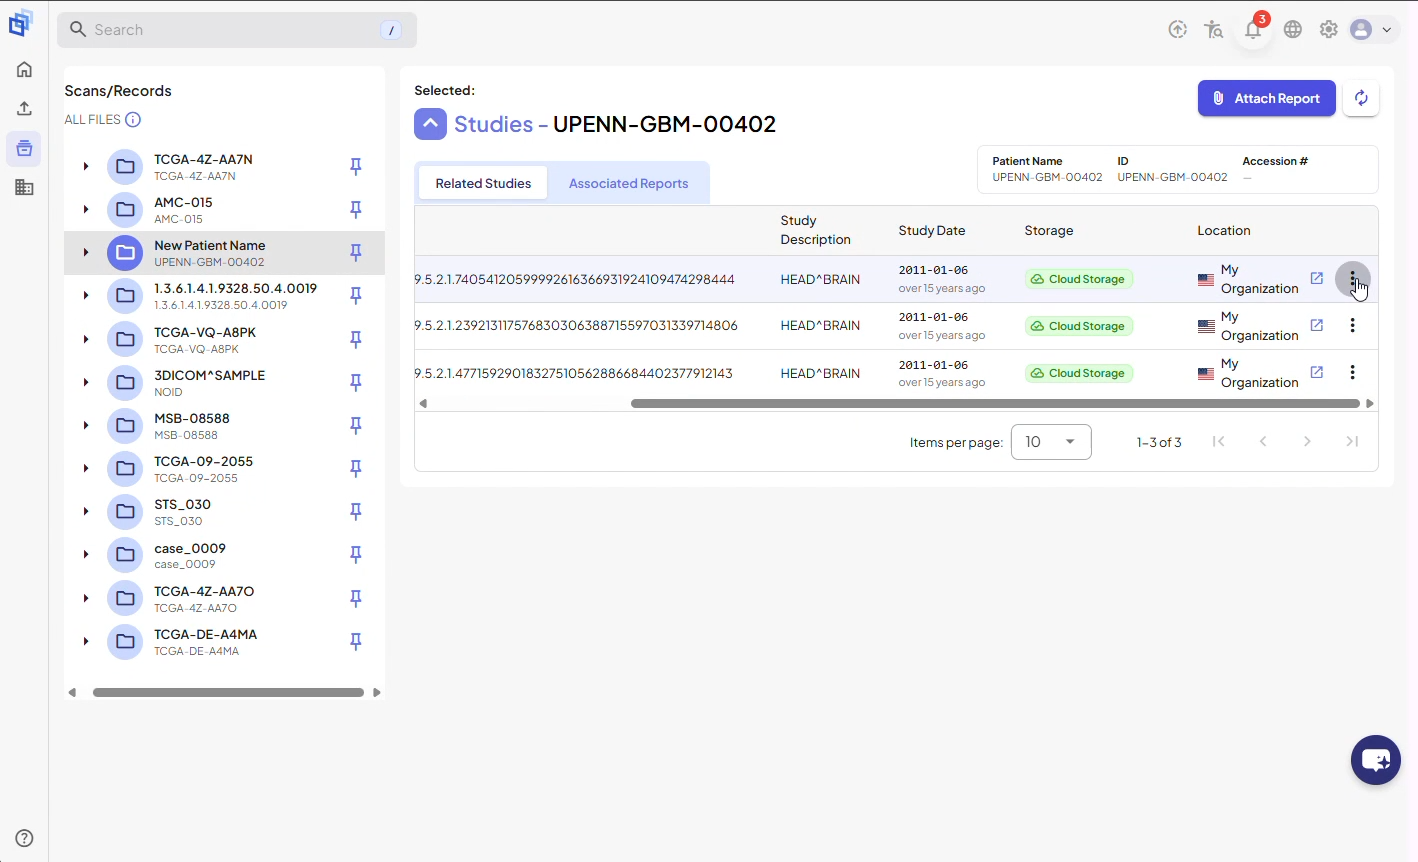
Step 9. Click a patient folder to view its studies.
Step 10. Click the three-dots menu next to the study you want to update.
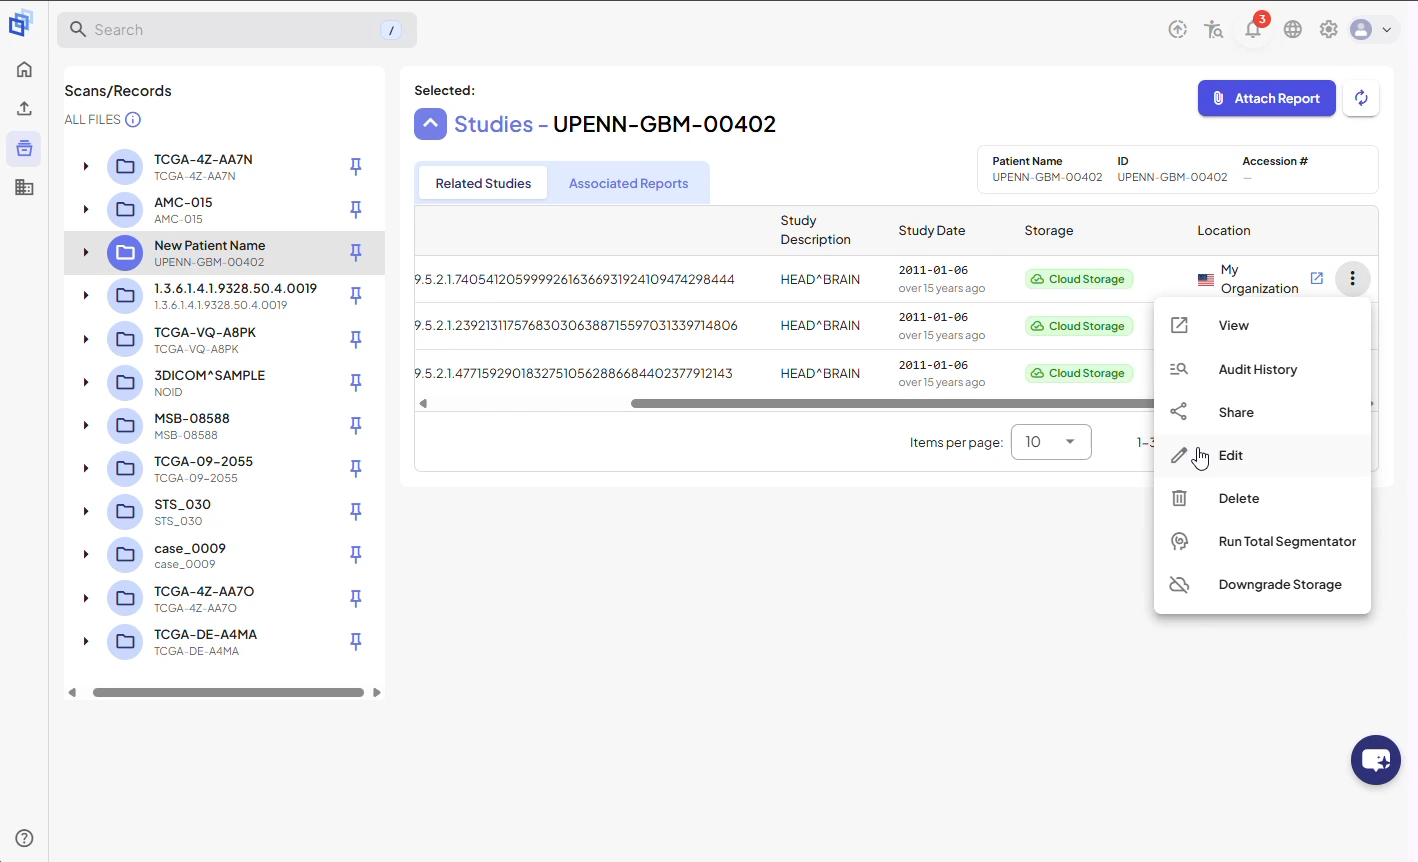
Step 11. Select Edit to open the dialog.
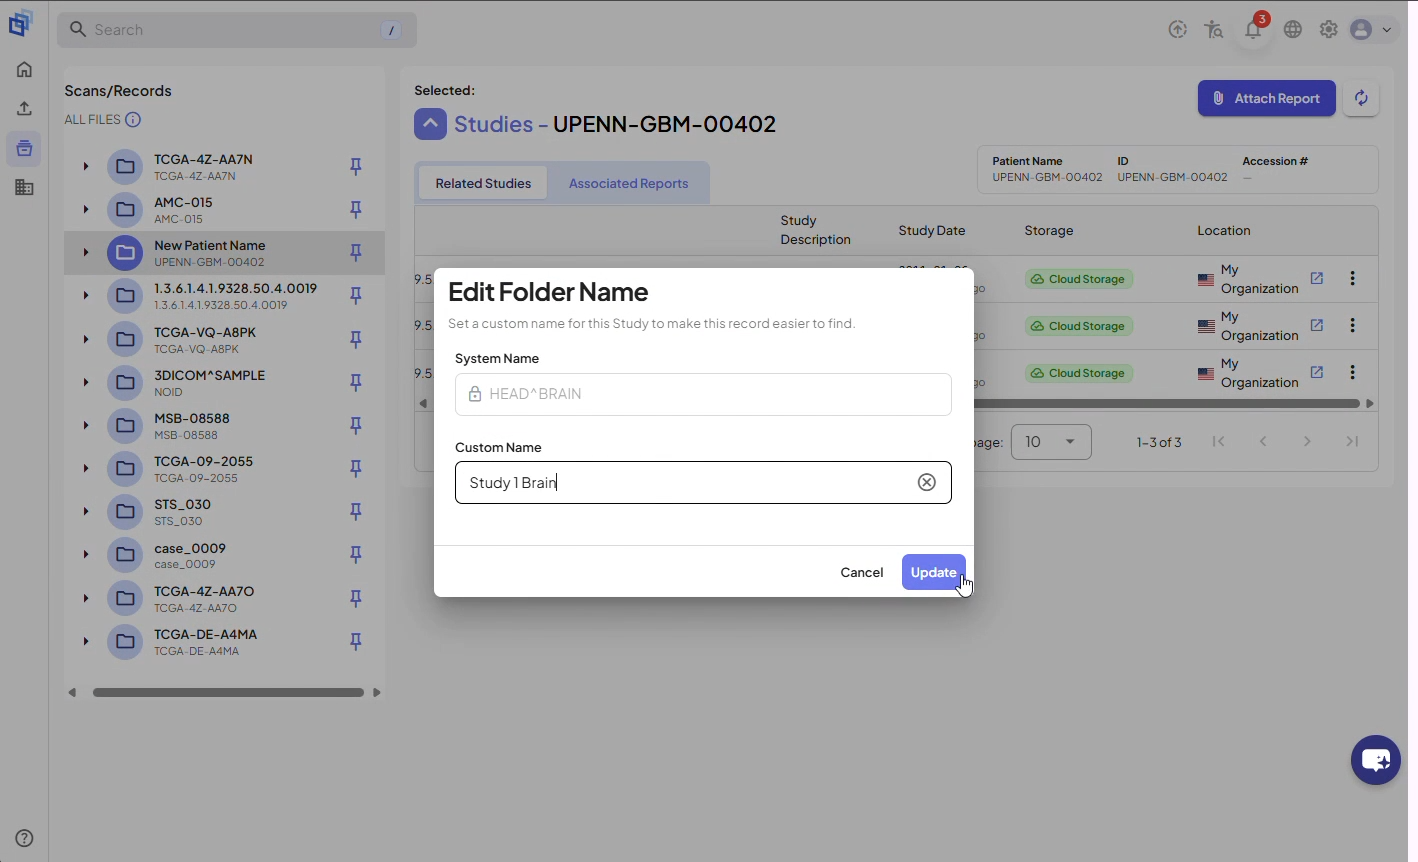
Step 12. Enter your custom study name and click Update to save your changes.
Delete studies
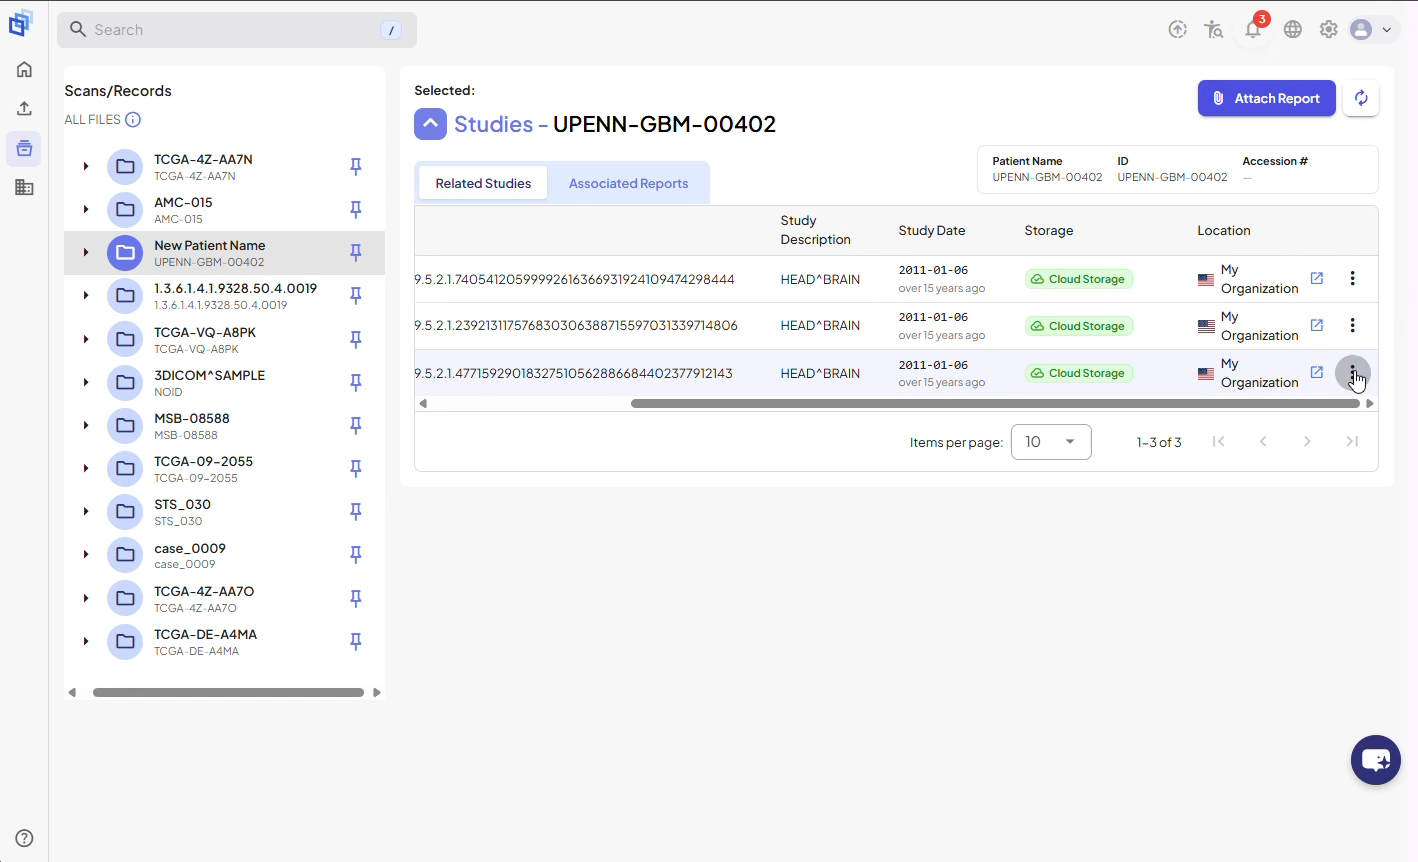
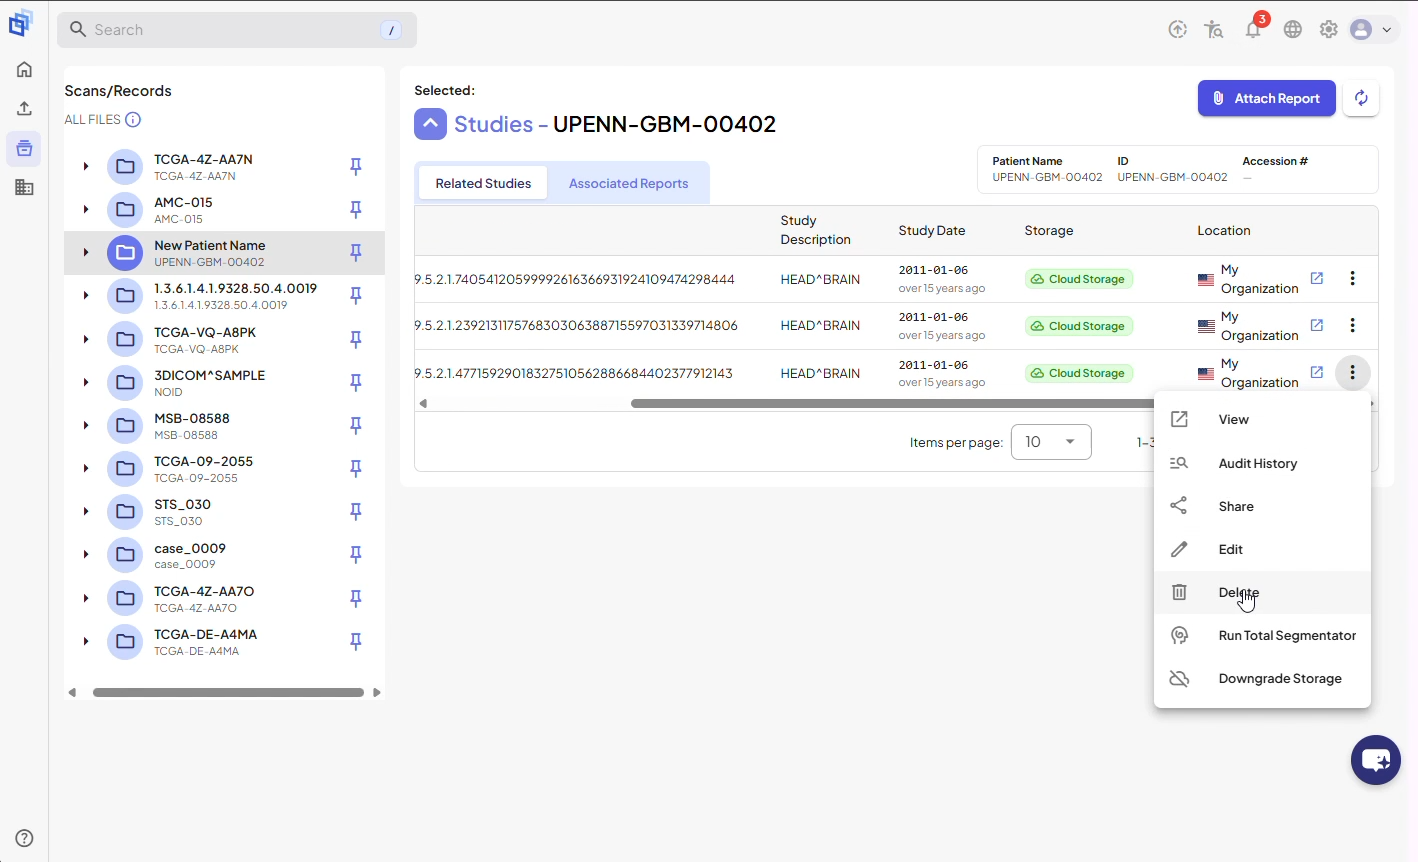
Step 13. Click the three-dots menu next to the study you want to delete and select Delete from the dropdown.
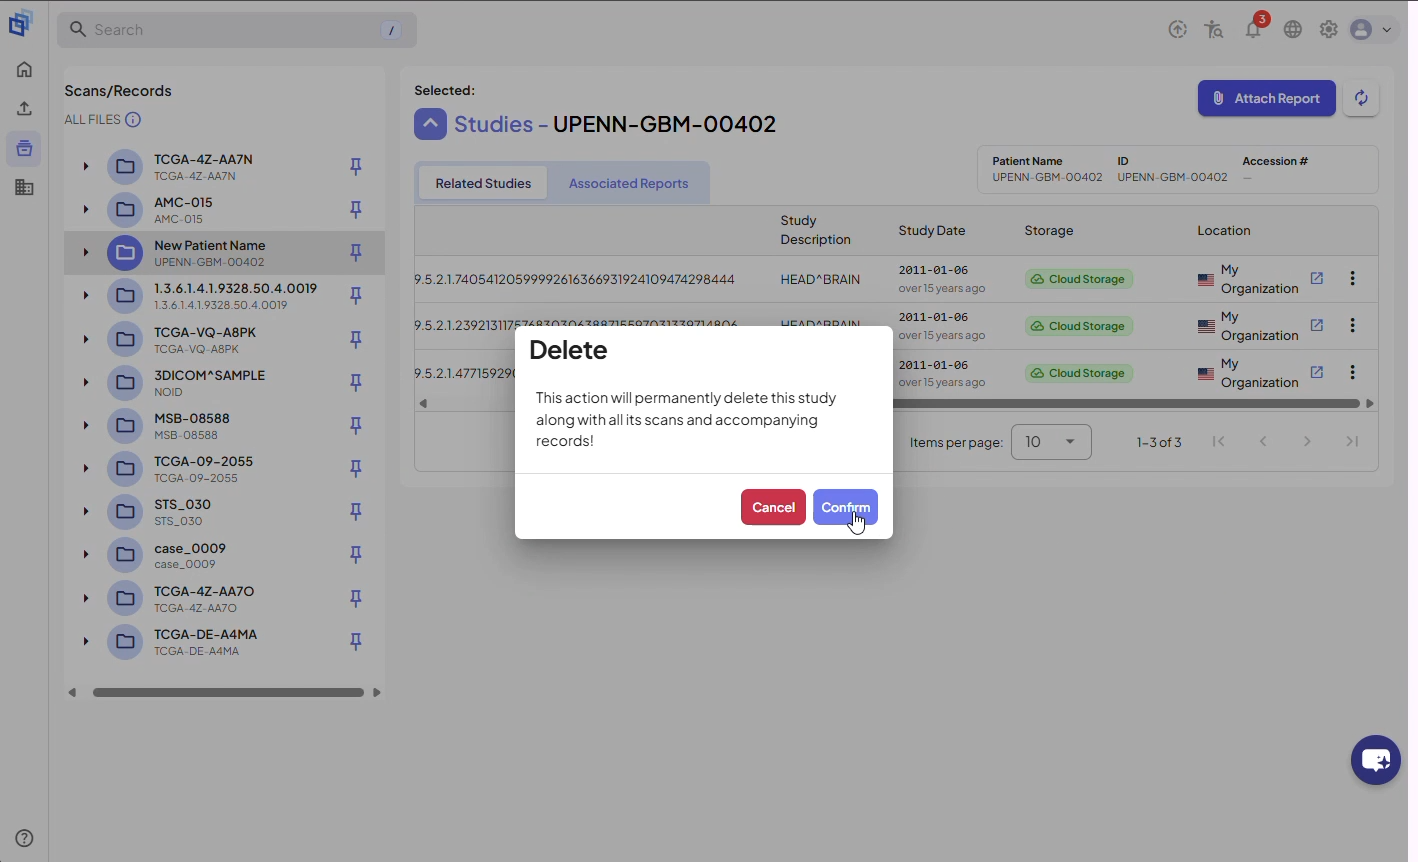
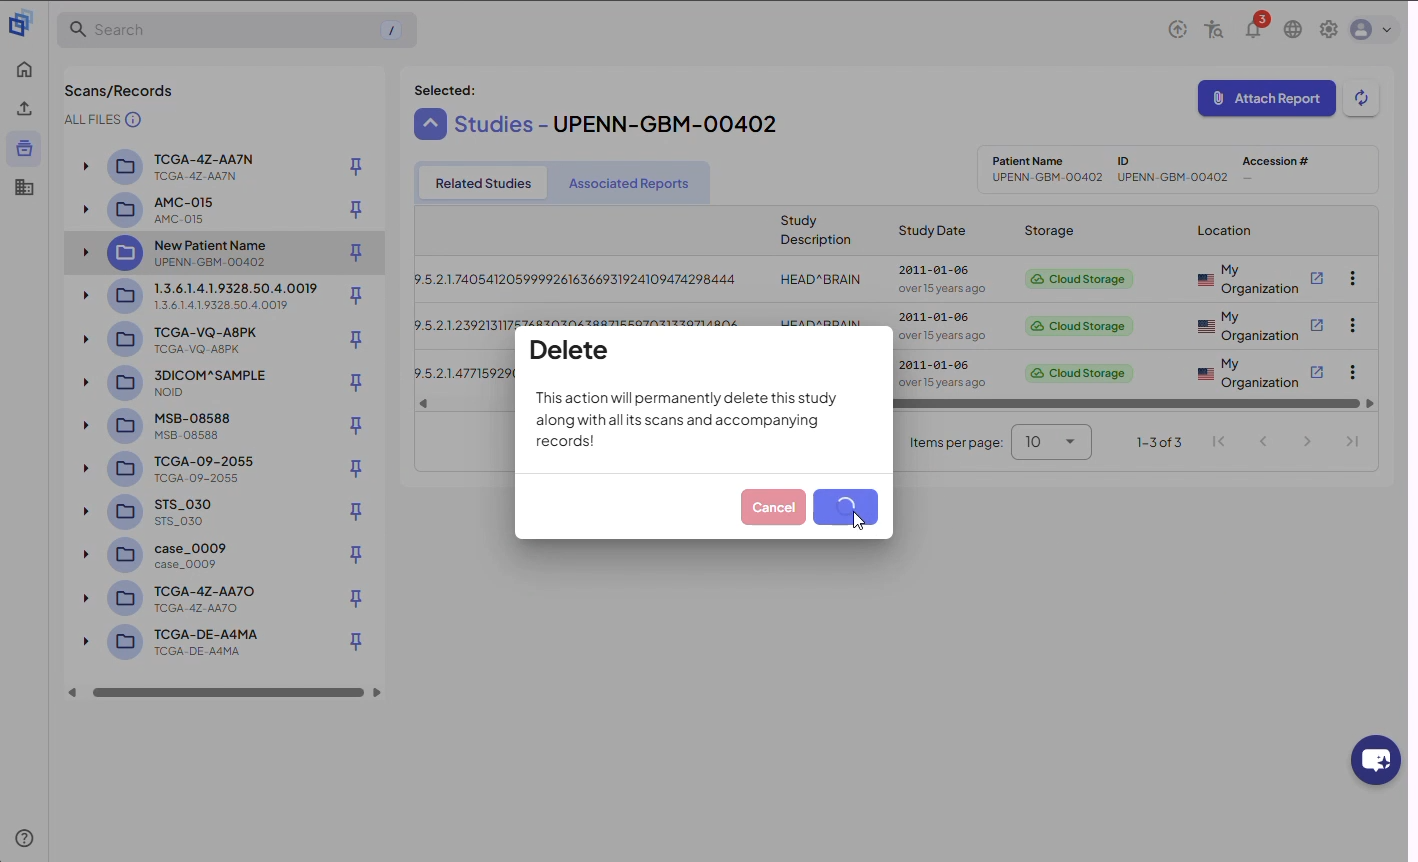
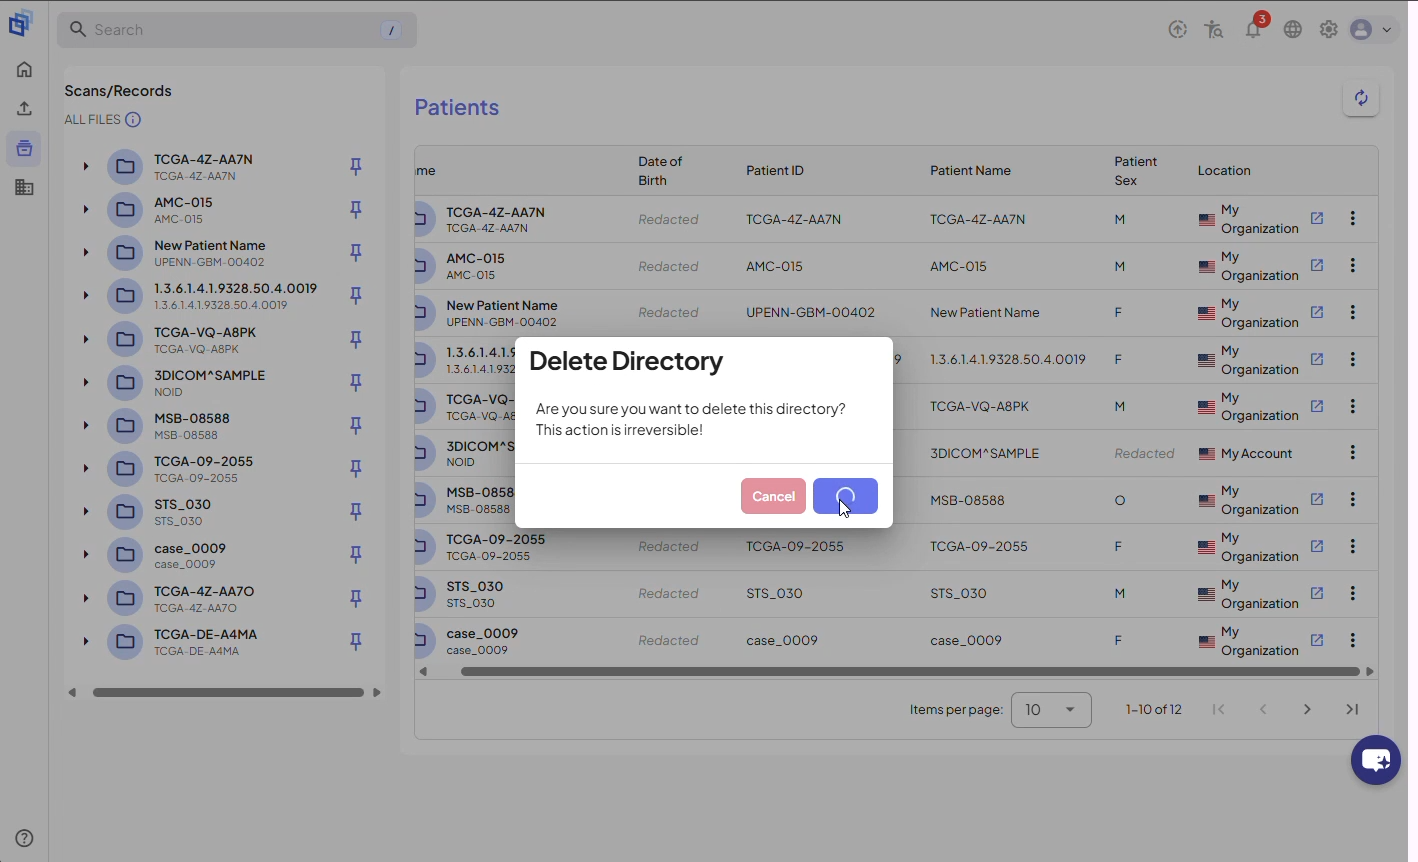
Step 14. When the confirmation window appears, review your selection and click Confirm to permanently delete the study.
Step 15. After deletion, a success banner will be displayed at the top of the screen.
Delete entire patient folders
Step 16. Select the patient folder in the navigation tree to return to the Patients table.
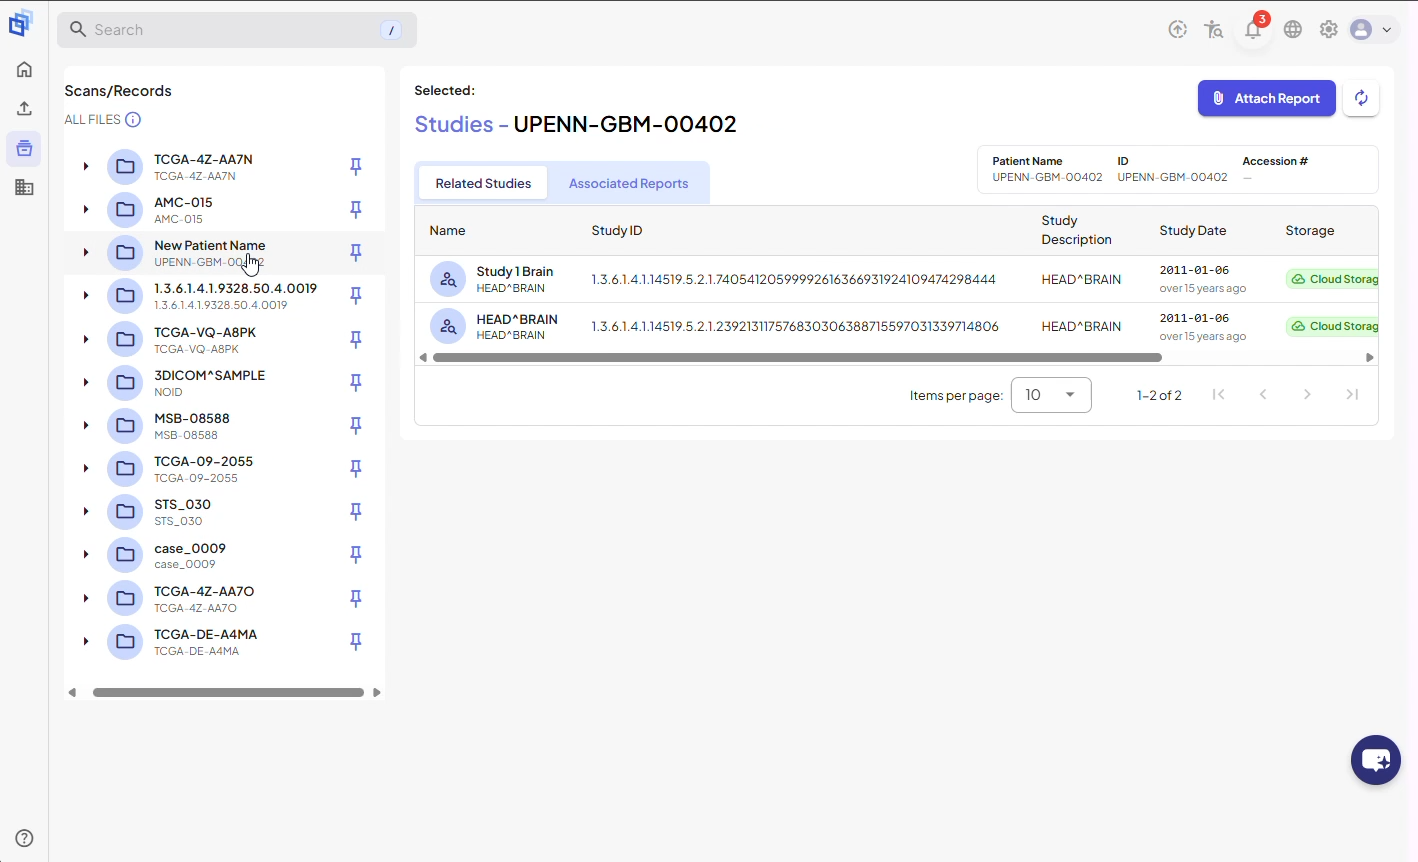
Step 17. Use the same deletion process as for studies.
Step 18. When the confirmation window appears, carefully review your selection—deleting a patient record will also permanently delete all associated studies and series. Confirm only if you are certain.
Result
After following these steps, you will be able to organise, rename, and delete patient folders and studies in 3DICOM as needed.